Courses / Working at Height and Fall Protection
Working at Height and Fall Protection
About this certificate. This is a theory course. The certificate records that you completed the theory and passed its assessment. It is not an accredited qualification. Many countries also require practical assessment before theory counts towards a statutory requirement — check what applies where you work. Full terms.
Restraint or arrest, the harness and connectors that make each work, the anchor they hang from, and the clearance and rescue plan that decide whether a fall is survivable.

Create a free account to start this course
The lessons are free once you have an account. The assessment and the certificate are part of a subscription.
The hierarchy of control in practice

Protective equipment is the last line of defence, not the first. This lecture works through the hierarchy of control — elimination, substitution, engineering, administration and PPE — using real workplace examples to show why the order matters and where teams commonly skip straight to the bottom.
By the end of this session you will understand the key principles behind risk management and be able to apply them to your own workplace with confidence. The lecture keeps the theory practical and connects every point back to the relevant EN standards and tools available across SafetyOrbit.
Live sessions are announced on the Training Calendar , and recordings are added to the Lectures library afterwards. To go deeper on the standards referenced here, visit the EN Standards Library .
A ranked sequence of control measures – elimination, substitution, engineering controls, administrative controls, and PPE – ordered from most to least effective, used to select controls for an identified hazard.
Key points
- What you will take away
- Watch and follow up
Full reference: The Hierarchy of Control in Practice ↗
How and why to use a fall arrest lanyard
An energy-absorbing lanyard is the most commonly issued piece of fall-arrest connecting equipment on European sites, and the most commonly misused. Get the anchor height, the clearance below the working position and the harness attachment point right, and it limits the force on the body to a survivable level. Get any one of them wrong and the lanyard either does nothing useful or transfers a fall load the wearer's body was never meant to take. This article sets out what a fall-arrest lanyard is under EN 354 and EN 355, how it must be connected and anchored, how to calculate the clearance it needs, and what takes it out of service.
A fall-arrest lanyard is a connecting subsystem between a full body harness and an anchor point. In practice, two different products are described by that phrase, and only one of them is a fall-arrest component on its own:
What most workers call a "shock-absorbing lanyard" is the combined assembly: an EN 355 absorber pack permanently joined to an EN 354-type leg, with EN 362 connectors at each end. That assembly, together with an EN 361 full body harness and an anchor conforming to EN 795 , forms a fall-arrest system in the sense of EN 363.
A person falling 2 m generates far more force than the human skeleton and soft tissue tolerate if that fall is stopped abruptly. The purpose of the EN 355 pack is not to stop the fall, it is to slow it: the stitching tears progressively, extending the stopping distance and capping peak force at or below 6 kN. Everything else follows from that. The absorber needs travel to deploy, so the system needs vertical space – which is why clearance, not webbing strength, is the usual failure point in real incidents.
Key points
- EN 358 work positioning lanyards connect to the side attachment points of a belt or harness. They are for holding the user in position, not for arresting a fall.
- EN 360 retractable type fall arresters arrest earlier in the fall and generally need less clearance, but have their own anchor and edge restrictions.
- EN 353-2 guided type fall arresters on a flexible anchor line are for climbing and vertical movement, not for general tethering.
- the length of the lanyard assembly before deployment (up to 2 m);
- the maximum deployment of the energy absorber, as stated by the manufacturer (commonly up to about 1.75 m);
Full reference: How and Why to Use a Fall-Arrest Lanyard ↗
Fall restraint versus fall arrest
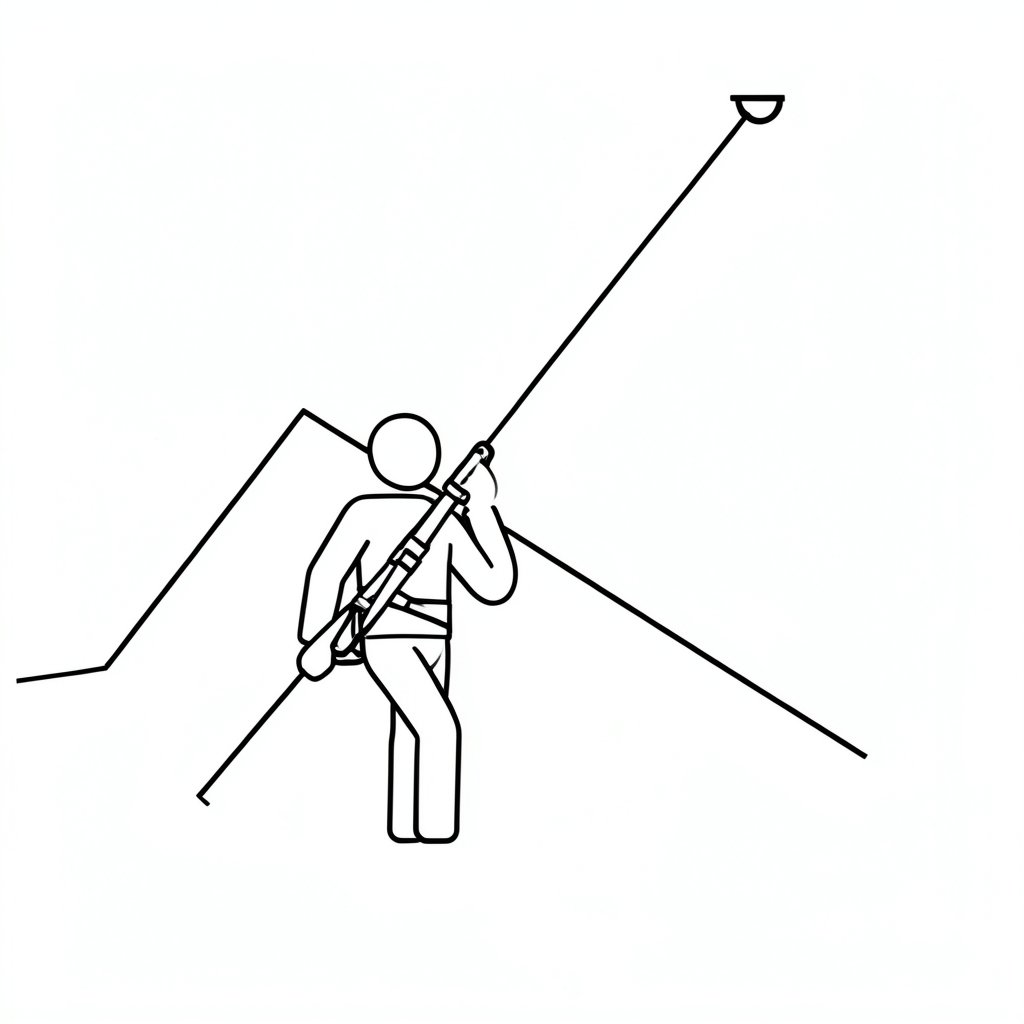
Roof work forces an early decision that shapes every piece of equipment that follows: is the system going to stop the worker reaching the edge at all, or is it going to catch them after they have already gone over it? Restraint and arrest are not two strengths of the same idea — they are different jobs, built from different equipment, and mixing them up is one of the most common ways a roof-work system fails to do what it was supposed to do.
A restraint system uses a fixed-length lanyard and an anchor positioned so that, at full stretch, the worker physically cannot reach the fall edge, a fragile roof light, or any other hazard. The lanyard is typically used with a belt meeting EN 358 for work positioning and restraint , or a full body harness to EN 361 used in restraint mode. Done correctly there is no fall to arrest — the geometry itself is the control. This makes restraint the preferred option wherever the roof layout allows it, because it removes the need for rescue planning, energy absorption and fall clearance calculations that arrest systems require.
Restraint only works if the maths is done properly. The lanyard length, the anchor position and the distance to the hazard all have to be checked together, on the actual roof, not assumed from a drawing. A lanyard that is a metre too long turns a restraint system into an accidental arrest system, with none of the shock-absorbing capacity that arrest requires.
A fall-arrest system accepts that a fall is possible and is designed to stop it safely once it has started, within a calculated clearance distance below the working position. It needs an energy absorber or a guided-type fall arrester to bring the deceleration forces within survivable limits, a full body harness meeting EN 361 — fall-arrest attachment is not permitted on a restraint-only belt to EN 358 — an anchor rated for arrest loads, and — critically — enough clear space below the anchor for the system to fully deploy before the worker hits anything.
Key points
- What restraint actually does
- What arrest does instead
- Why the two should not be blended
- Deciding which one the task needs
- Common errors
Full reference: Fall Restraint vs Fall Arrest for Roof Work: Choosing the Right System ↗
Module 1 assessment
The assessment is part of a subscription
You have full access to every lesson in this course. Taking the assessment and earning the certificate needs a subscription.
4 questions · 80% to pass · unlimited retakes. The lesson material is hidden while you answer.
1. Where does PPE sit in the hierarchy of control?
2. What defines a fall restraint system?
3. Why is restraint generally preferred to arrest where the layout allows it?
4. A restraint lanyard is one metre too long for the anchor position. What has been created?
EN 361 – full body harnesses
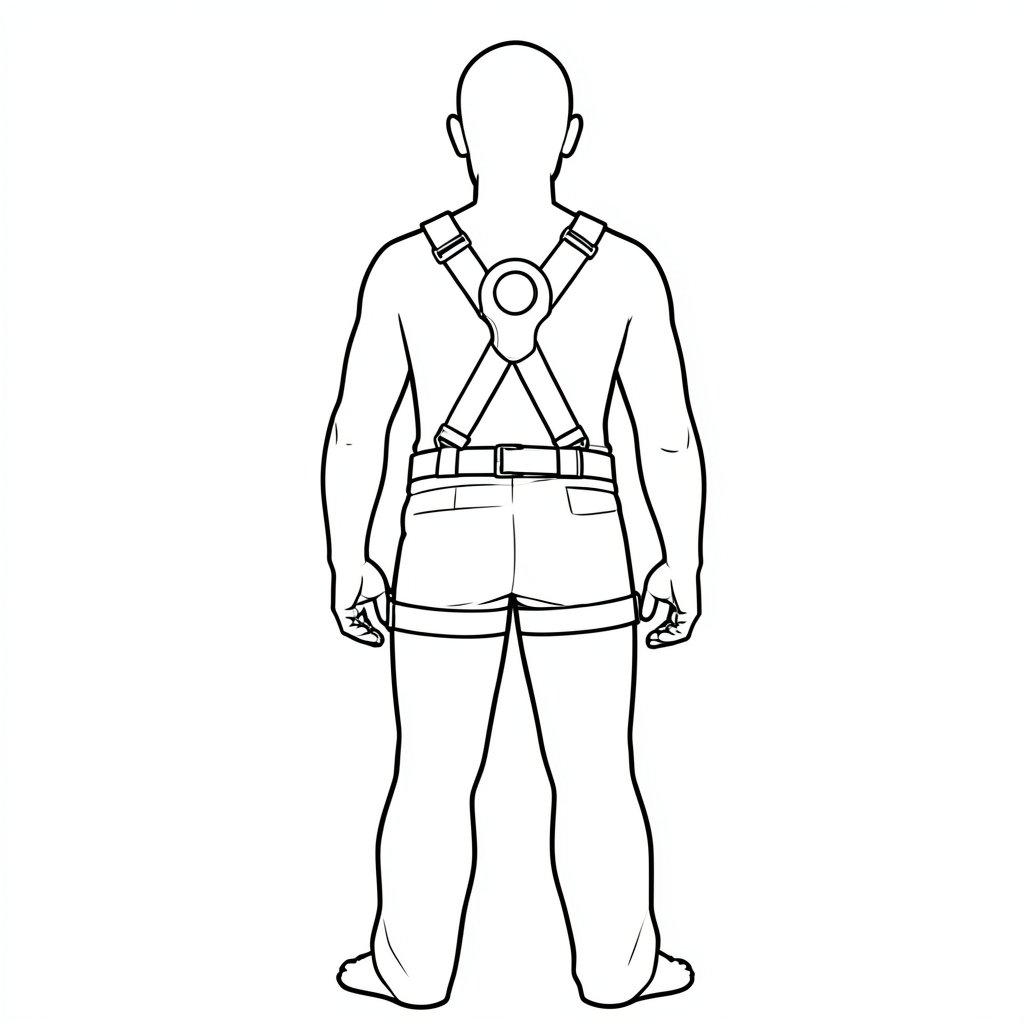
EN 361 is the European standard specifying design, testing and marking requirements for full body harnesses used as the core connection point in a personal fall arrest system. A compliant harness distributes fall arrest forces across the thighs, pelvis, chest and shoulders to protect the wearer's body during and after a fall. This guide explains the requirements, attachment points, selection criteria and inspection routine for EN 361 harnesses.
EN 361 applies to full body harnesses intended to be used together with a fall arrest subsystem – typically an energy absorbing lanyard or guided type fall arrester connected to an anchor device. It defines the static and dynamic strength requirements for the harness, the position and marking of attachment points, and the information manufacturers must supply for correct fitting and use.
The dorsal ring on the back and sternal point on the front are the two primary attachment points.
Selecting a harness depends on the task: fall arrest work at height requires a dorsal (rear) attachment point at minimum, ladder climbing benefits from an additional sternal (front) point, and confined space or rescue work may call for a harness with shoulder lifting points as well. Padding, adjustability and compatibility with tool belts or other PPE should also be factored into the choice for all-day comfort.
Key points
- Does not cover anchor devices – see EN 795 anchor devices .
- Does not cover guided type fall arresters – see EN 353 guided type fall arresters .
- Work positioning belts without fall arrest attachment points fall under EN 358 work positioning and restraint belts instead.
- Rescue harnesses with additional lifting points may reference EN 1497 in addition to EN 361.
- Static strength testing of webbing, stitching and buckles under high load without failure
Full reference: EN 361 – Full Body Harnesses ↗
Choosing an absorber for the clearance available
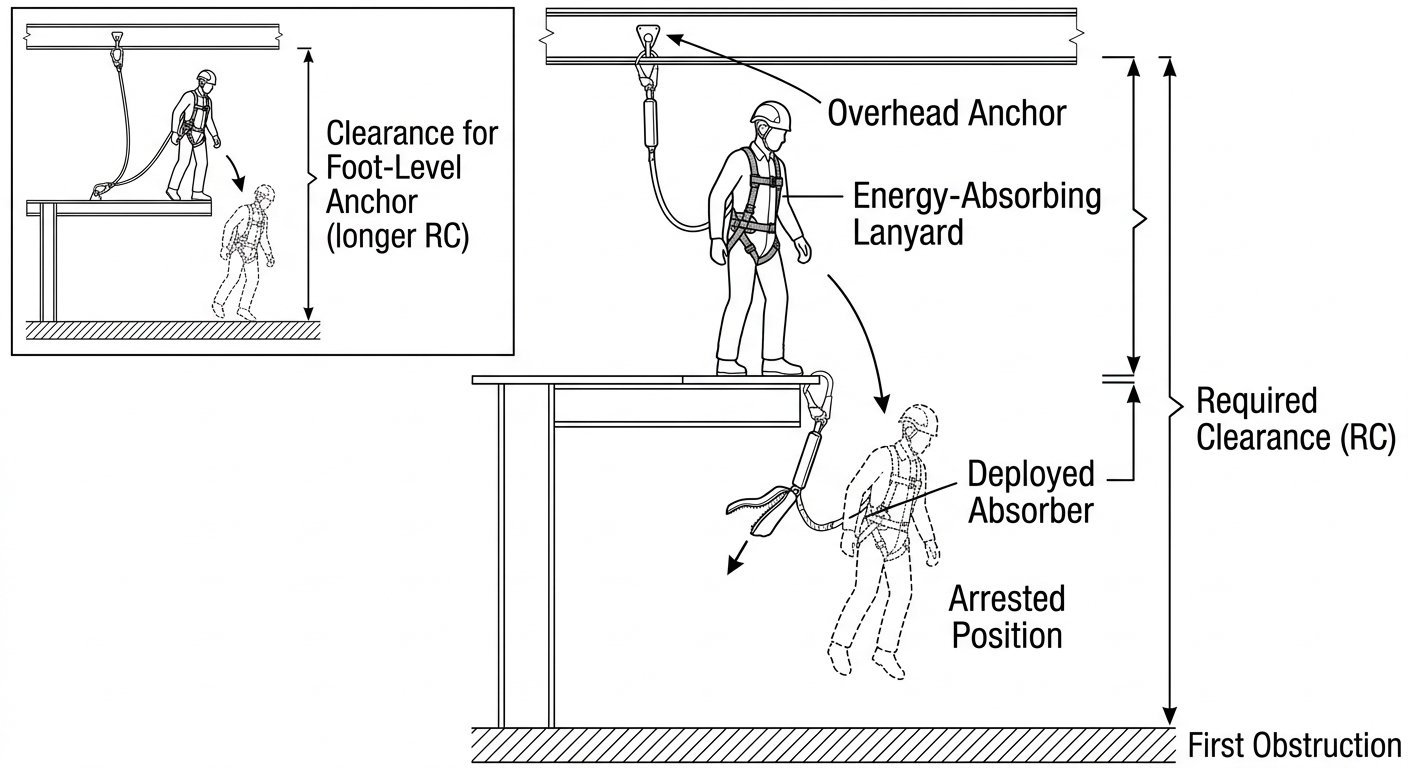
An energy absorber is only as good as the empty space underneath it. The absorber limits the force on the body during a fall arrest, but it does that by lengthening the fall — and if the structure, the plant floor or a pipe rack sits inside that lengthened distance, the worker stops against the obstruction rather than in the system. Choosing an absorber for the clearance available means measuring the space below the work position first, then selecting a lanyard length, absorber model and anchor position that fit inside it — not the other way round.
This note covers how to measure the clearance that actually exists, how to read the clearance figure in the manufacturer's instructions, what to do when the two numbers do not agree, and which common workarounds create risk instead of space.
The relevant distance is from the soles of the user's boots at the work position down to the nearest thing they could hit. On a steel frame that is often a beam flange or a grating two metres below, not the slab twelve metres below. On a tank roof it may be a nozzle, a handrail or a scaffold lift. Water, live machinery and open hoppers all count as obstructions in the practical sense even where they are not solid ground.
Two further points get missed when a site survey is done from a drawing rather than in position:
Key points
- Flexible anchors. A horizontal lifeline or a rail with any give sags under load. That sag adds directly to the fall distance and must come from the system designer's calculation, not from a guess on site.
- Free fall — the distance travelled before the absorber starts to work. It depends on the lanyard length and on how far the anchor sits above or below the harness attachment point.
- Harness and body extension — stretch in the webbing plus the way the dorsal or sternal attachment shifts on the body under load. Instructions usually roll this into a fixed allowance.
- Height of the attachment point above the feet — typically taken as around one and a half metres for a standing adult, because the clearance is measured from the boots but the system holds the harness attachment.
- Safety margin — the residual gap left below the stopped user, commonly one metre in manufacturer instructions.
Full reference: Choosing an Absorber for the Clearance Available ↗
EN 362 – connectors
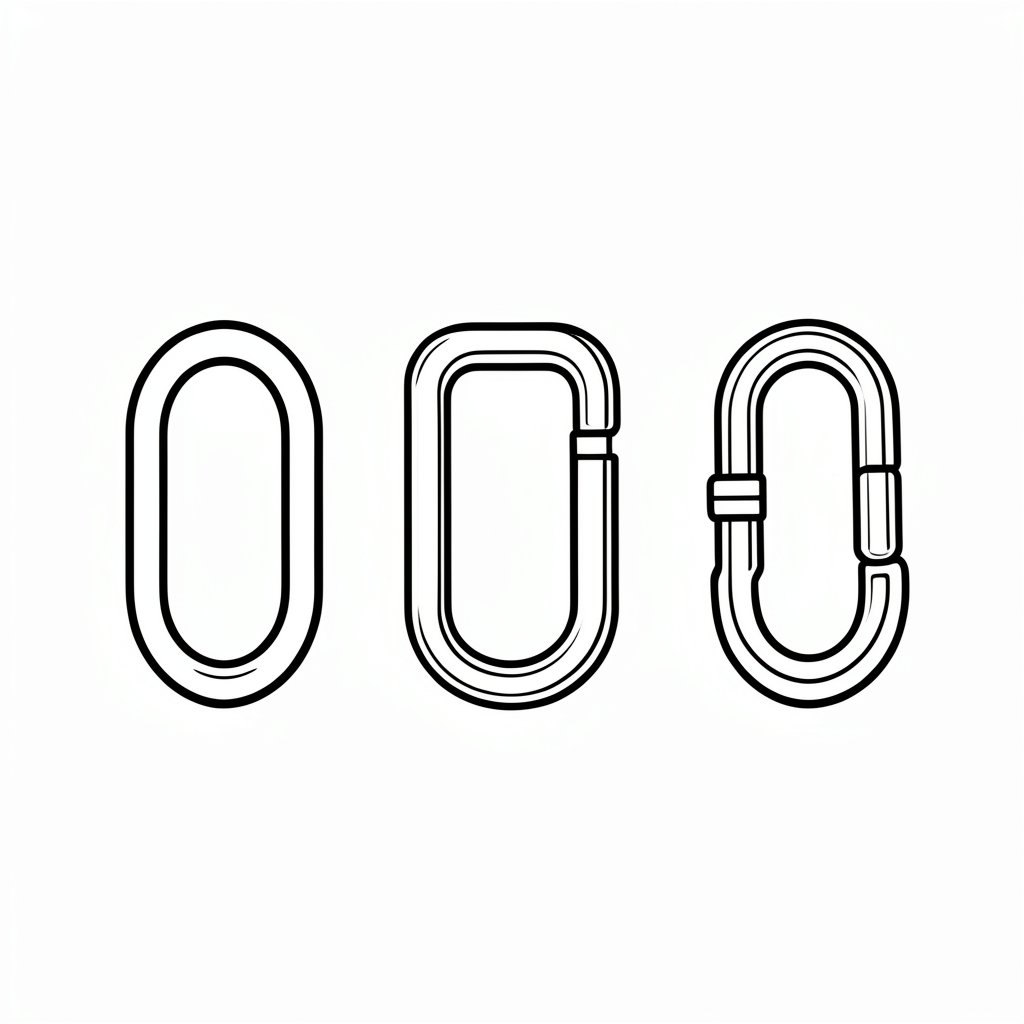
EN 362 is the European standard specifying design, strength and marking requirements for connectors – karabiners, snap hooks and screw links – used to join the different components of a personal fall protection system. A connector is often the smallest part of the fall protection chain but a failure point here can compromise the entire system, making correct classification and use essential. This guide explains the connector classes, gate strength requirements and how to choose the right connector for each link in the chain.
EN 362 applies to connectors used to link components of personal fall protection equipment, such as joining a lanyard to a harness attachment point or a fall arrester to an anchor line. It specifies static strength, gate strength, and corrosion resistance requirements, along with a classification system describing the intended application of each connector type.
Connector classes range from basic karabiners to large scaffold hooks, each rated for a specific use.
Selecting a connector depends on where it sits in the fall protection chain: a connector attaching directly to an anchor point should be Class A, a general link between a lanyard and harness is typically Class B, and a connector that may be loaded from multiple directions during use should be Class M for added safety margin. Screw links (Class Q) are often used for permanent or rarely-disconnected joins where accidental gate opening must be eliminated.
Key points
- Gate strength testing to confirm the gate remains closed and locked under load
- Minor axis (side loading) testing for connectors intended for multi-directional use (Class M)
- Corrosion resistance testing for outdoor and marine environments
- Clear marking including manufacturer, standard reference, class and maximum rated load
- Check the gate opens and closes smoothly and the locking mechanism engages fully before each use
Full reference: EN 362 – Connectors for Fall Protection ↗
Which attachment points to use for restraint
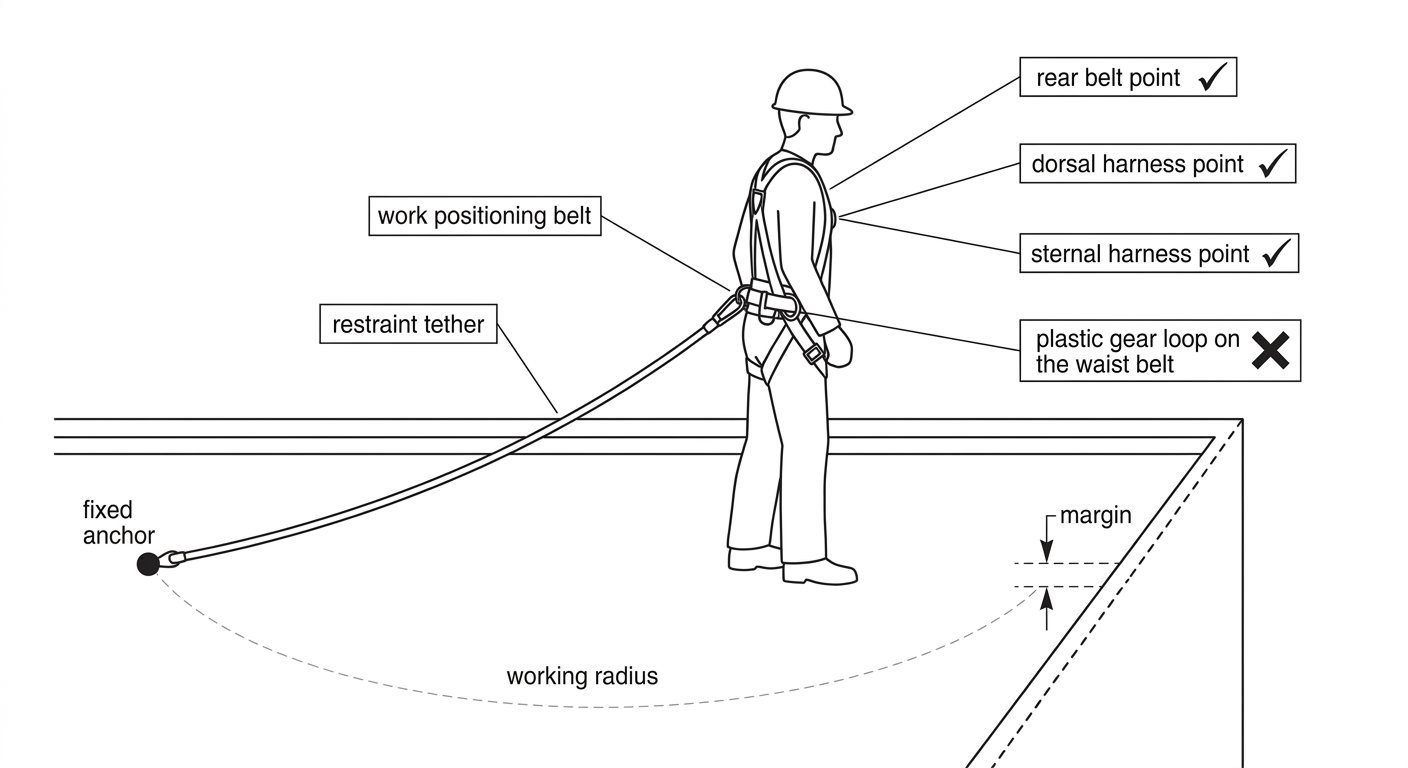
Restraint work looks simple on paper: connect to an anchor with a tether short enough that the worker cannot physically reach the fall hazard. Because a fall is designed out of the system rather than arrested, the attachment point on the body does not have to absorb a fall load — which is exactly why the choice gets treated carelessly. The practical questions on site are which points on the belt or harness are actually intended for this, which one keeps the tether out from under the worker's feet, and which loops on the equipment are not attachment points at all. Getting that wrong either creates a trip hazard, loads a textile loop that was never designed for it, or leaves a system that fails the moment the risk assessment shifts from restraint to fall arrest.
In a correctly designed restraint system, the attachment point carries no load during normal work. It only sees load when the worker walks or leans out to the limit of the tether and comes up against it — a static pull, roughly body weight or less, applied slowly and horizontally. That is a mild duty compared with fall arrest or work positioning.
Two consequences follow. First, several different points on typical equipment are technically adequate. Second, the decision should be driven by geometry and by what happens if the assessment changes, not by load capacity alone.
On the equipment most crews already own, there are usually four or five places a restraint tether could legitimately go.
Key points
- Dorsal point on a full body harness. The fall-arrest attachment on a harness certified to EN 361 (full body harnesses) . Perfectly usable for restraint, and the most future-proof choice on a surface where the hazard picture might change.
- Sternal point on a full body harness. Also an EN 361 fall-arrest point, also usable for restraint. Useful when the anchor is ahead of the worker and the tether needs to stay in view.
- Ventral point on a sit or rope-access harness. A load-bearing attachment intended for suspension and work positioning. Most manufacturers permit restraint use, but this is a point where instructions vary, so read them rather than assume.
- Gear and tool loops. Typically plastic or light webbing, rated for equipment only, often with no rating at all. Never a tether point.
- Rear haul or trailing loops. On some rope-access harnesses a small rear loop is provided for carrying a rope tail. It is not a body attachment point and is easily mistaken for the dorsal point.
Full reference: Which Attachment Points to Use for Restraint ↗
Module 2 assessment
The assessment is part of a subscription
You have full access to every lesson in this course. Taking the assessment and earning the certificate needs a subscription.
4 questions · 80% to pass · unlimited retakes. The lesson material is hidden while you answer.
1. Which standard covers full body harnesses?
2. May a fall-arrest lanyard be attached to a work positioning belt to EN 358?
3. What is the purpose of an energy absorber to EN 355?
4. A connector is loaded across its gate rather than along its spine. Why does it matter?
EN 795 – anchor devices
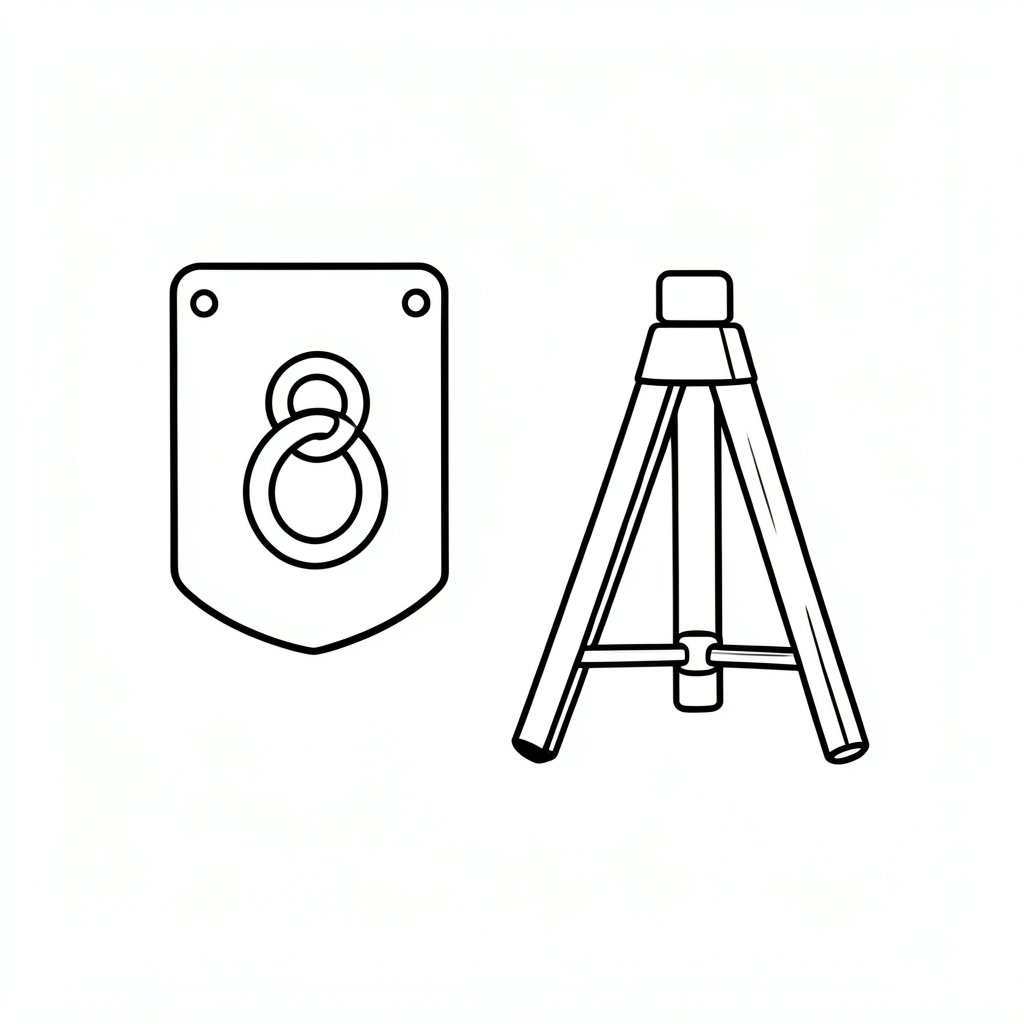
EN 795:2012 is the European standard that specifies requirements, testing methods and marking for anchor devices used together with personal fall protection equipment. An anchor device is the fixed or transportable point to which a harness, lanyard, energy absorber or fall arrester is connected, and its reliability is fundamental to the safety of the entire fall protection chain. This guide explains the scope, classification, selection criteria and inspection requirements of EN 795, and how it relates to other personal protective equipment standards used in work-at-height applications.
EN 795:2012 applies to anchor devices intended for use with personal fall protection systems, including full body harnesses, connectors, energy absorbers, guided type fall arresters and work positioning equipment. It covers structural anchors, transportable anchors, anchor lines and rail-based systems designed to provide a secure connection point during work at height. The standard specifies static and dynamic strength requirements, corrosion resistance, marking and the information that manufacturers must supply.
Choosing an anchor device depends on the structure available, the number of workers who need to connect simultaneously, and whether the anchor will be permanent or temporary. Class A anchors suit fixed structural points, Class B suits mobile or short-duration tasks, Class C and D horizontal systems allow workers to move laterally along a facade or roof edge, and Class E deadweight anchors are useful where penetrating the roof surface is not permitted. Always confirm the anchor's rated capacity matches the connected system and the number of users specified by the manufacturer.
EN 795:2012 specifies requirements, testing and marking for anchor devices used with personal fall protection equipment such as harnesses, lanyards and fall arresters.
Key points
- Does not cover connectors such as karabiners and snap hooks – see EN 362 connectors .
- Does not cover guided type fall arresters on flexible or rigid anchor lines – see EN 353 guided type fall arresters .
- Does not cover work positioning and restraint belts – see EN 358 work positioning and restraint belts .
- Permanently installed anchors for building facades may also require separate structural certification beyond EN 795.
- Static strength testing under specified load without fracture or excessive deformation
Full reference: EN 795:2012 – Anchor Devices for Fall Protection ↗
Understanding and optimising fall clearance
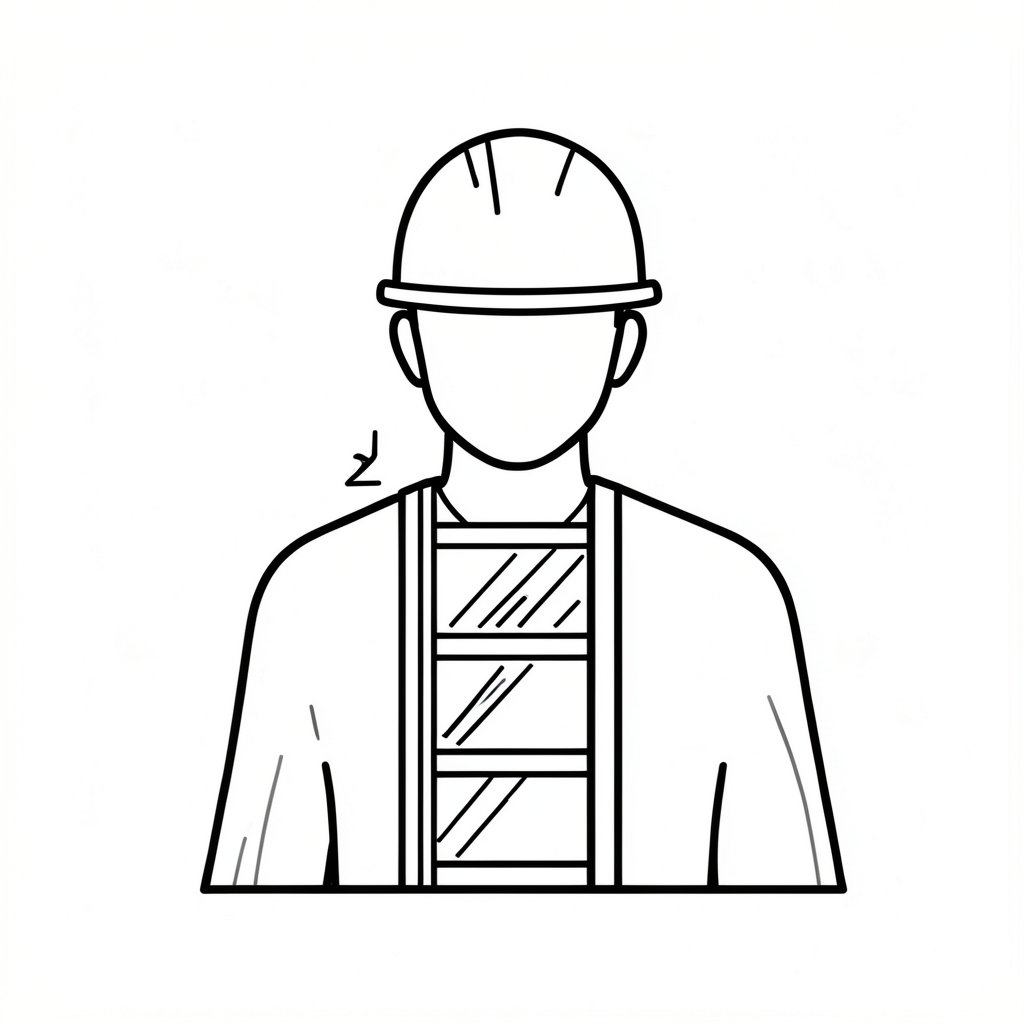
A harness to EN 361 , a certified anchor and a correctly connected energy absorber are worthless if there is not enough clear space beneath the worker for the system to do its job. Fall clearance is the number that decides whether a fall is arrested in mid-air or against a floor, a beam or a stack of materials. It is also the single figure most often left out of a method statement — and the one that changes every time an anchor is moved, a lanyard is swapped or a work platform is lowered. This article sets out how fall clearance is calculated under the EN framework, which components consume it, and what can realistically be done when there is not enough of it.
Fall clearance is the minimum unobstructed vertical distance required below the user, at the moment the fall begins, for the fall arrest system to bring the fall to a stop before any part of the body strikes the ground, a lower level or an obstruction.
Two measurement datums are in common use, and mixing them up is a frequent source of error:
The difference between them is the distance from the dorsal attachment point to the soles of the feet, roughly 1.5 m for an average adult. Whichever datum is used, it must be stated explicitly on the drawing or in the risk assessment.
Key points
- Below the user's feet — the datum a supervisor can actually measure on site with a tape from the working surface.
- Free fall: 2.0 m (the full lanyard length, because the anchor is at dorsal attachment height)
- Absorber deployment: 1.75 m (the EN 355 maximum, unless the instructions give a lower figure)
- Harness extension and D-ring slide: 0.4 m
- Anchor overhead, 2 m above the dorsal attachment: the lanyard is already taut, free fall is close to zero, and only deployment, harness extension and the margin consume clearance.
Full reference: Understanding and Optimising Fall Clearance ↗
Suspension trauma – why minutes matter
A worker who has been arrested in a fall is not safe. They are alive, which is what the fall arrest system was designed to achieve, but they are now hanging motionless in a harness, and a second and largely separate hazard has just started: suspension trauma. This is the reason a rescue plan for work at height has to be timed in minutes, not "we'll call the fire service." It is also the reason that harness fit, attachment point choice and the presence of suspension relief straps are not comfort details but survivability details.
Suspension trauma – also described in the literature as orthostatic intolerance during suspension, or harness hang syndrome – is a circulatory failure caused by immobile upright suspension.
When a person hangs vertically and cannot move their legs, two things happen at once. The leg muscles stop contracting, so the muscle pump that normally pushes venous blood back toward the heart stops working. At the same time, the harness thigh straps compress the soft tissue of the upper legs, restricting venous return further while arterial pressure keeps delivering blood into the limbs. Blood pools in the legs and pelvis. Venous return to the heart falls, cardiac output falls with it, and cerebral perfusion drops.
The result is a classic presyncopal sequence: light-headedness, nausea, sweating, greying or narrowing vision, unusually slow or unusually fast pulse, then loss of consciousness. It can develop in a person who is uninjured, conscious and talking at the start of the suspension.
Key points
- They require a conscious, uninjured, aware casualty. They do nothing for someone who is already unconscious, has an arm or leg injury from the fall, or is disoriented.
- They must be deployed early. A worker who waits until symptoms are advanced may not be able to complete the movement.
- They buy time for rescue. They are not a rescue, and they are not a reason to slow one down.
- Work positioning keeps the worker supported and able to move rather than hanging inert.
- No lone working in fall arrest. A suspended worker with nobody to raise the alarm has no rescue timeline at all.
Full reference: Suspension Trauma: Why Minutes Matter ↗
Selecting a rescue kit for the task
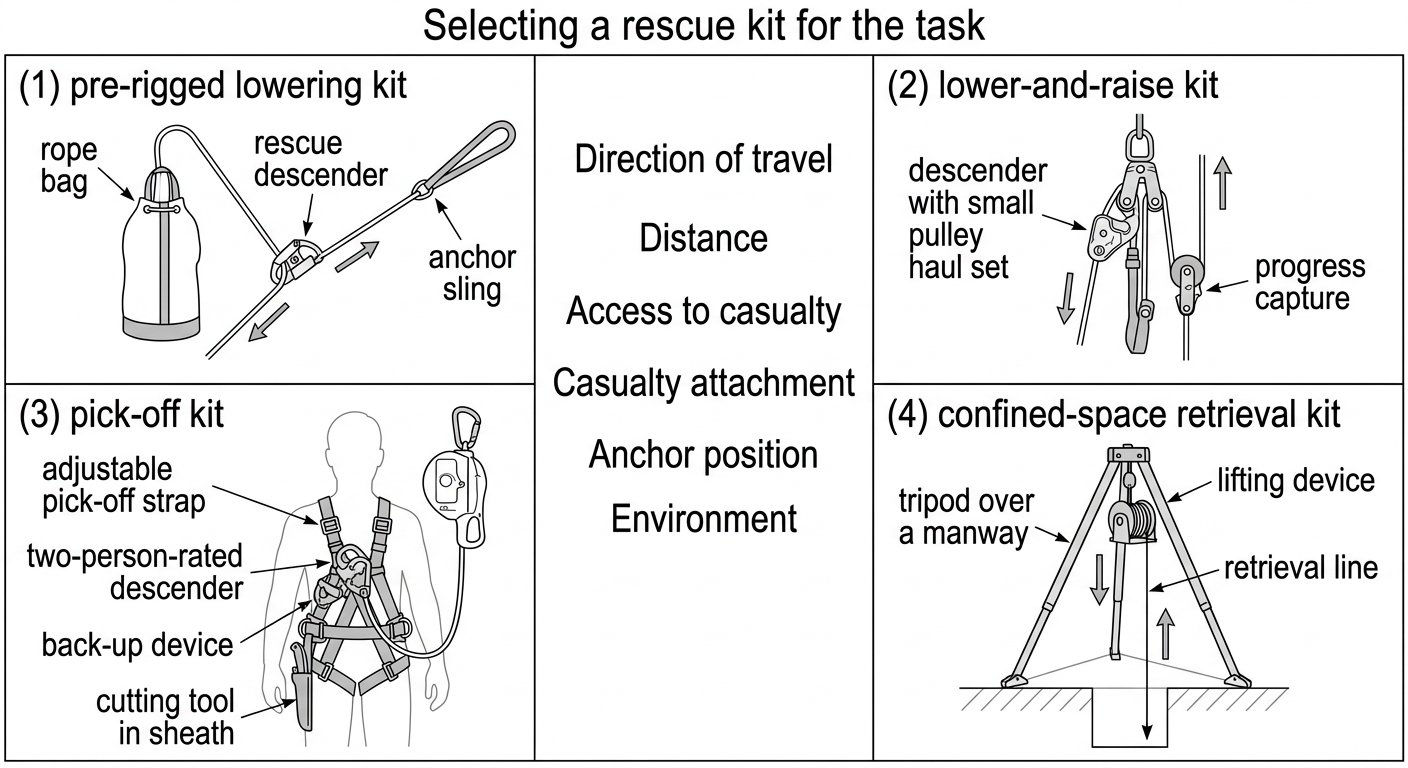
A rescue kit is only useful if it matches the rescue you have actually planned for. The most common failure is not equipment failure – it is a kit that can lower but not raise, a rope that is shorter than the drop, or a retrieval winch bolted to a tripod over a shaft that the casualty will never be pulled straight up through. Selecting a rescue kit for the task means working backwards from a specific, written rescue scenario: where the casualty will be, which direction they need to move, how far, who reaches them, and what the anchor above them can actually do.
This note sets out the questions that decide the kit, and the equipment families that answer each one.
If there is clear, unobstructed space beneath the casualty and a safe landing zone, lowering is almost always the fastest and least equipment-intensive option. A pre-rigged descent kit – a rescue descender pre-installed on a bagged low-stretch rope, with an anchor sling and connectors – can be deployed by one person quickly. Rescue descenders are the subject of EN 341, which covers descender devices for rescue ; devices are classified by the descent energy they are rated to handle, so a kit for a tall structure is not necessarily the same device as a kit for a two-storey lower.
Raising is required when the casualty is below the anchor and there is no way down: a vertical entry into a tank or shaft, a bund, or a pit. Here the kit is normally a fixed anchor structure (tripod, davit or quadpod) plus a lifting device intended for rescue — either a rescue winch or a retractable fall arrester with an integrated retrieval function. Raising is slow and physically demanding, so the mechanical advantage or gearing of the device matters more than its weight.
Key points
- Who performs the rescue. A trained rope-access team on site, a single competent attendant at the top of a manhole, or an external emergency service with a stated response time.
- The time budget. Suspension in a harness is time-critical, and so is any confined-space atmosphere problem. A plan that depends on an off-site team arriving later is not a rescue plan for suspension.
- The anchor and access reality. What exists above, beside or below the work position, and whether a rescuer can physically get to the casualty.
- An adjustable pick-off strap or short adjustable lanyard to attach the casualty to the rescuer's attachment point and to take up the slack precisely.
- A means of lifting the casualty a few centimetres to unweight their jammed device or taut lanyard — typically a small pulley set or the adjustable strap used as a short haul.
Full reference: Selecting a Rescue Kit for the Task ↗
Module 3 assessment
The assessment is part of a subscription
You have full access to every lesson in this course. Taking the assessment and earning the certificate needs a subscription.
4 questions · 80% to pass · unlimited retakes. The lesson material is hidden while you answer.
1. Which standard covers anchor devices?
2. Which of these consumes fall clearance below the anchor?
3. Why must a rescue plan exist before work begins rather than after a fall?
4. An anchor is rated for one person. Two workers clip into it. What is the problem?
Course assessment
The assessment is part of a subscription
You have full access to every lesson in this course. Taking the assessment and earning the certificate needs a subscription.
6 questions drawn from every module · 80% to pass · unlimited retakes.
1. Where does PPE sit in the hierarchy of control?
2. A restraint lanyard is one metre too long for the anchor position. What has been created?
3. Which standard covers full body harnesses?
4. A connector is loaded across its gate rather than along its spine. Why does it matter?
5. Which standard covers anchor devices?
6. An anchor is rated for one person. Two workers clip into it. What is the problem?
Course complete
100%
Every module and the final assessment passed
Certificates are not issued yet — that needs a signed-in account, which is coming. Your progress is saved in this browser meanwhile.