Safety / Tips and Tricks / Rope access and confined space
Activity 01 · Rope access
Release and Rescue from a Static Rope: Load Transfer, Releasable Anchors and Getting the Casualty Down
A worker hanging motionless on a static rope is not a stable situation, and the clock that matters is the one measuring how long the harness has been taking their full body weight. On a low-stretch (static) rope the casualty is usually held by a device that has locked onto the sheath under load — a descender that has been panic-gripped, an ascender jammed against a knot, or a back-up device that has arrested on the safety line. None of those devices will let go while they are loaded. That single fact shapes every static rope rescue: before anyone can be lowered, the load has to be moved somewhere else. This article covers how that load transfer is done, how the rescuer reaches the casualty without creating a second casualty, and which EN standards define the equipment involved.
Why a static rope changes the rescue problem
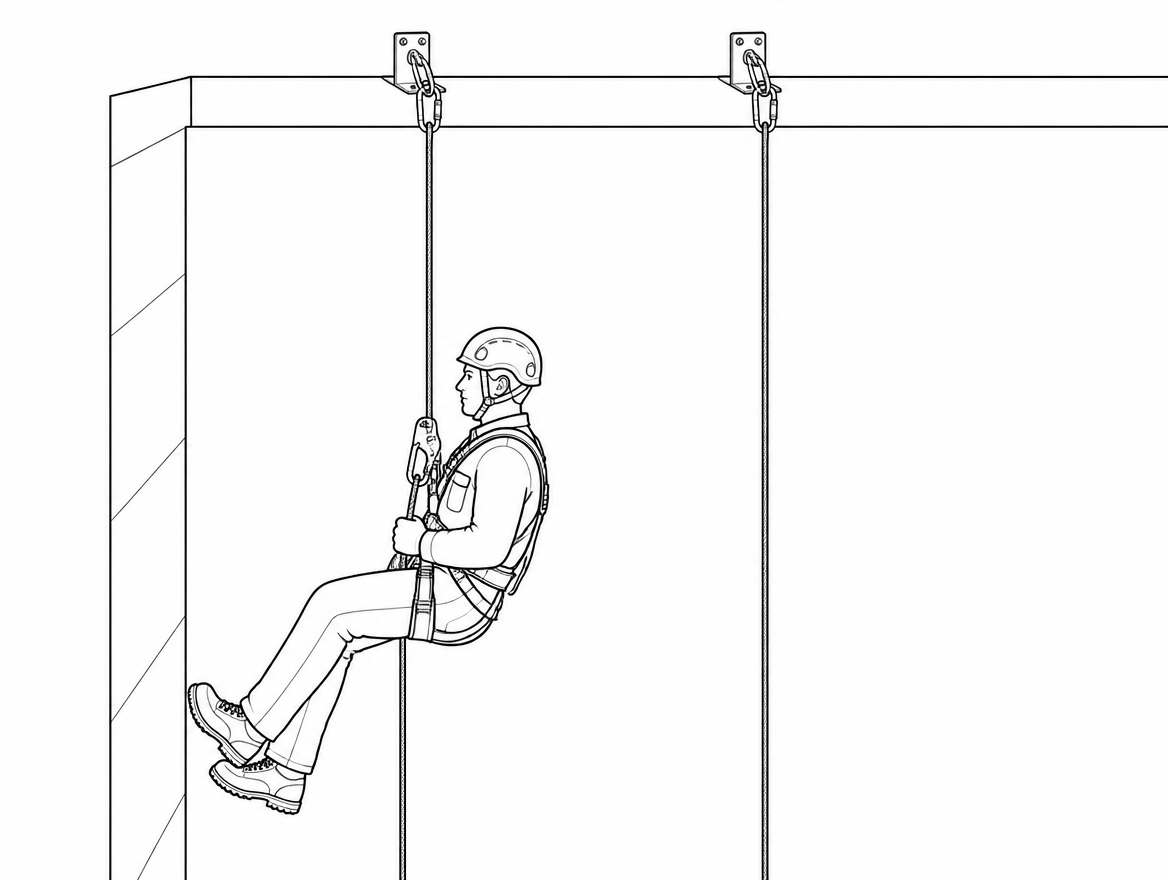
Static rope for work at height is specified by EN 1891, which covers low-stretch kernmantle ropes in Type A and Type B. Type A is the working standard for rope access and rescue; Type B is lighter-duty and has lower strength and lower test loads. EN 1891 limits elongation to 5 % between a 50 kg and a 150 kg load, which is exactly what makes the rope good for ascending and descending — and exactly what makes it unforgiving in a fall. There is almost no rope stretch available to absorb energy, so any slack in the system converts directly into impact force on the anchor, the device and the person.
Three practical consequences follow:
- A loaded rope grab or descender cannot be opened or released until the tension on it is removed.
- A rescuer who approaches with slack in their own line risks a short but high-force fall onto a rope that will not stretch to help them.
- Sheath damage caused by an arrested cam is frequently invisible from the outside, which matters for the post-incident decisions described at the end of this article.
The equipment framework around the rope is equally specific. Rope adjustment devices are covered by EN 12841, which splits them into Type A (back-up devices for the safety line), Type B (ascending devices) and Type C (descending devices), and which is written around use on EN 1891 Type A rope within the diameter range declared by the manufacturer. Devices intended for lowering people in rescue fall under EN 341, whose classes differ by rated load and total descent energy. Harness attachment points come from EN 361 (full body, fall arrest), EN 813 (sit harness, rope access), EN 358 (work positioning) and EN 1497 (rescue harnesses); rescue loops are EN 1498. Connectors are EN 362, pulleys are EN 12278, anchor devices are EN 795. For rope access work specifically, EN ISO 22846-1 and EN ISO 22846-2 set out the fundamental principles and the code of practice, including the expectation that rescue is planned and resourced before work starts, not improvised afterwards.
Time on the rope: urgency without guesswork
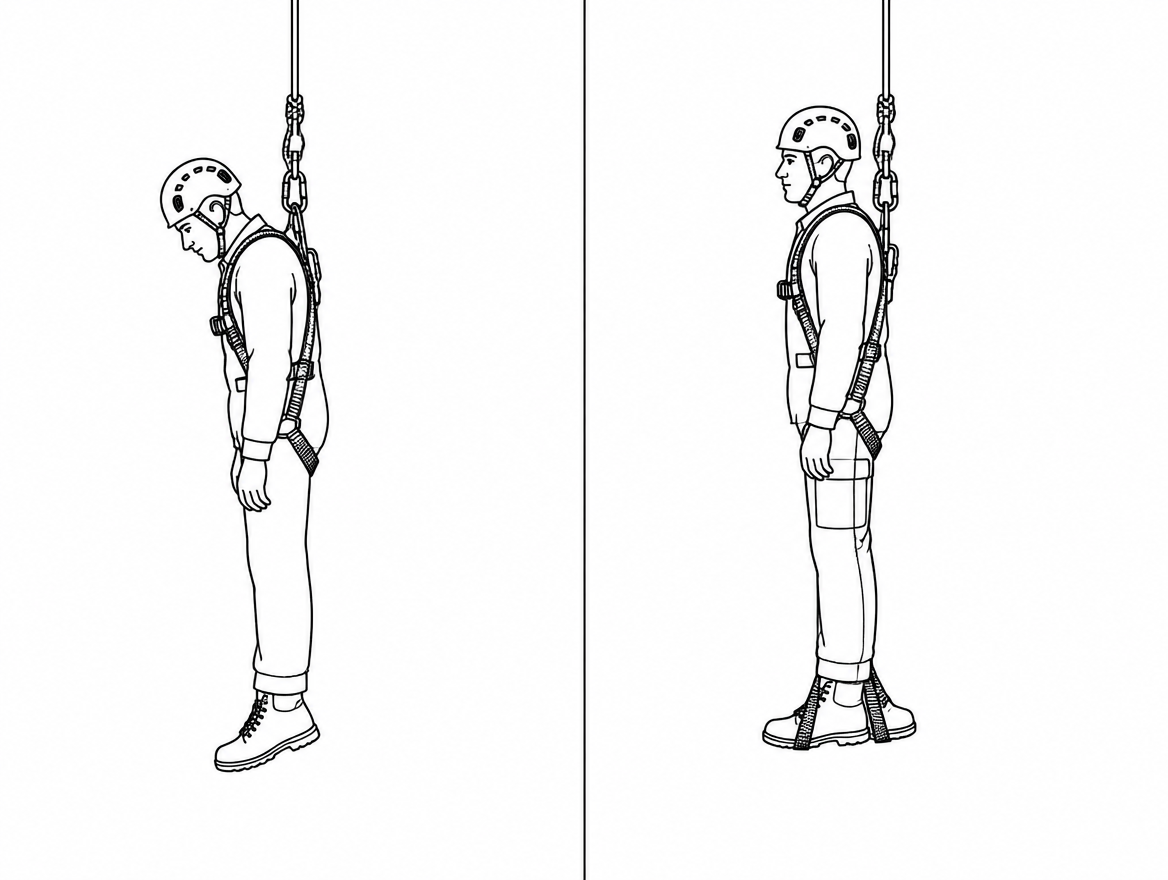
Prolonged motionless suspension in a harness can lead to suspension syncope (also called orthostatic intolerance or suspension trauma), in which venous return is impaired by immobility and by pressure from the leg straps. The mechanism is well established; the specific survival timelines that circulate in toolbox talks are not, and inventing a number does not help a rescue team. The defensible operational position is simpler: an unresponsive suspended person is a medical emergency, and the rescue plan should be built to reach and lower them in minutes, not to debate how many.
Two points are worth correcting because they still appear in older training material. First, the once-standard instruction to keep a rescued casualty semi-recumbent for a fixed period before laying them flat was reviewed in the research literature — the HSE-commissioned evidence review RR708 (2009) found the practice was not supported and could delay normal resuscitation. Current practice is to treat the casualty according to standard first-aid and resuscitation protocols. Second, a conscious casualty who can still act is not passive cargo: relieving leg-strap pressure by standing in foot loops or an aid étrier, and keeping the legs moving, buys time.
The two-rope rule and what it gives the rescue team
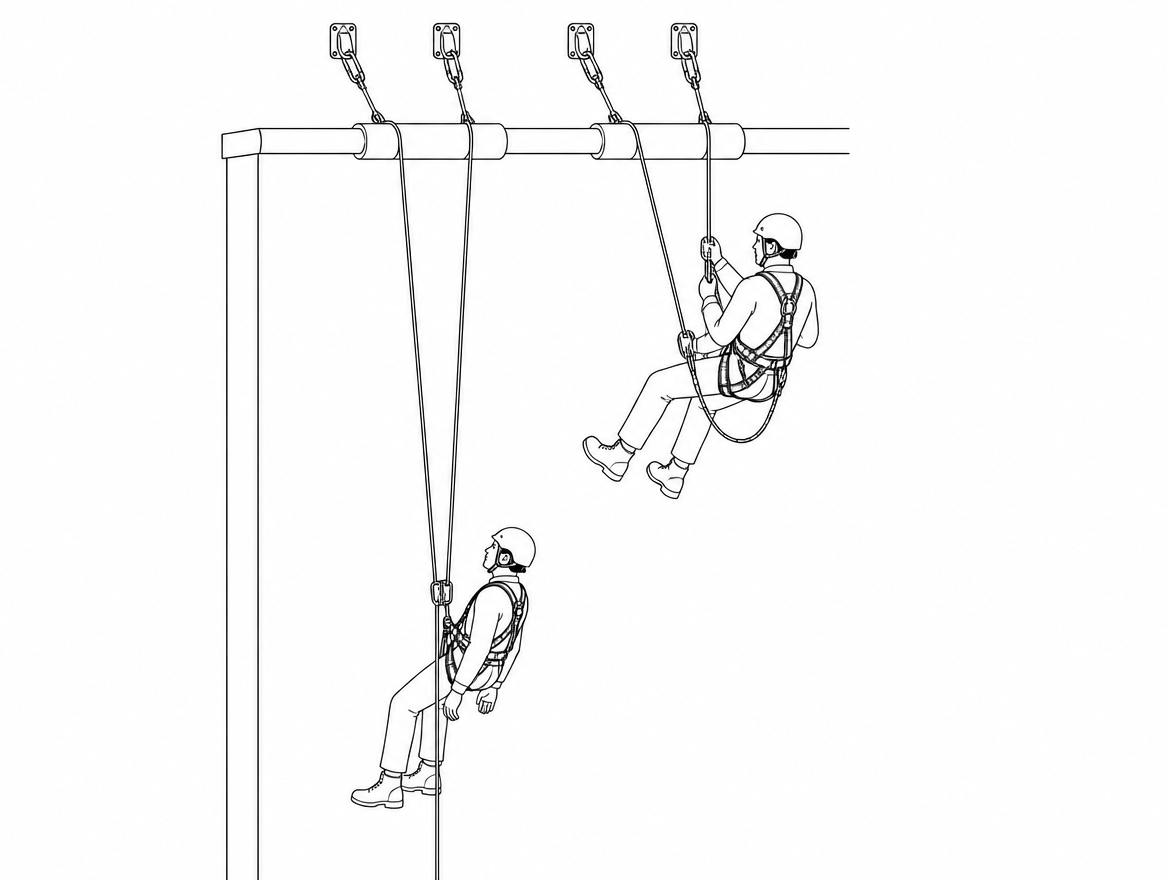
The EU work equipment framework for rope access — Annex II of Directive 2009/104/EC, which consolidated the temporary-work-at-height provisions introduced by Directive 2001/45/EC — requires as a rule a working line and a separately anchored safety line, with the worker connected to both. A single rope is permitted only where a risk assessment shows that a second line would make the work more dangerous, and then only with compensating measures.
For rescue purposes, that requirement is an asset rather than a formality. Two independently anchored ropes mean the casualty is already held on one system that the rescuer does not have to touch, leaving the other available for load transfer. It also means the failure being managed is usually a person problem — incapacitation, a jammed device, a knot reached mid-descent — rather than a rope failure.
Reaching the casualty without adding a fall factor
The approach is where rescues most often go wrong. Descending to a casualty on the same rope they are hanging from concentrates two people, two devices and any subsequent shock loading onto one anchor and one length of sheath that may already be damaged.
- Rig the rescue line from an anchor conforming to EN 795 that is independent of the casualty’s anchors, positioned as close to directly above the casualty as the structure allows.
- Descend on an EN 12841 Type C descender or an EN 341 device whose declared maximum load covers a two-person descent — this figure comes from the manufacturer’s instructions for the specific device and is not assumed from the standard alone.
- Keep the rescuer’s back-up device on a separate safety line and keep the connection short. Slack above a rope grab on static rope is the direct route to a high-force fall.
- Fit edge protection wherever the rescue line crosses an edge, and confirm the rope’s path before committing weight to it.
- Carry the load-transfer kit on the harness, not in a bag at the anchor. A rescuer who has to go back up for a pulley has lost the rescue.
Releasing a loaded device: three methods
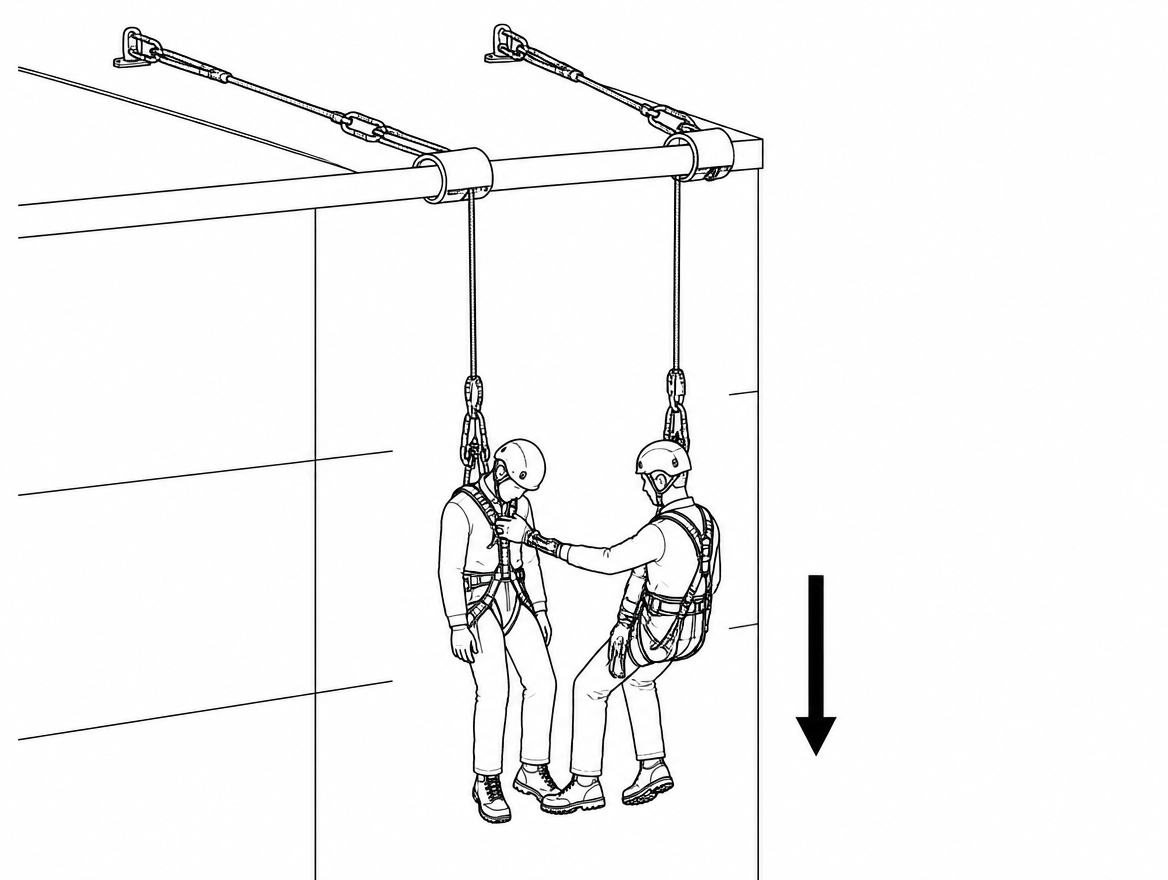
Once the rescuer is alongside the casualty, the casualty is connected to the rescue system — normally a short adjustable connection from the rescuer’s ventral attachment or a dedicated pick-off strop to the casualty’s sternal or ventral attachment point. Only then does the loaded device have to be dealt with. There are three ways to take tension off it, in descending order of preference.
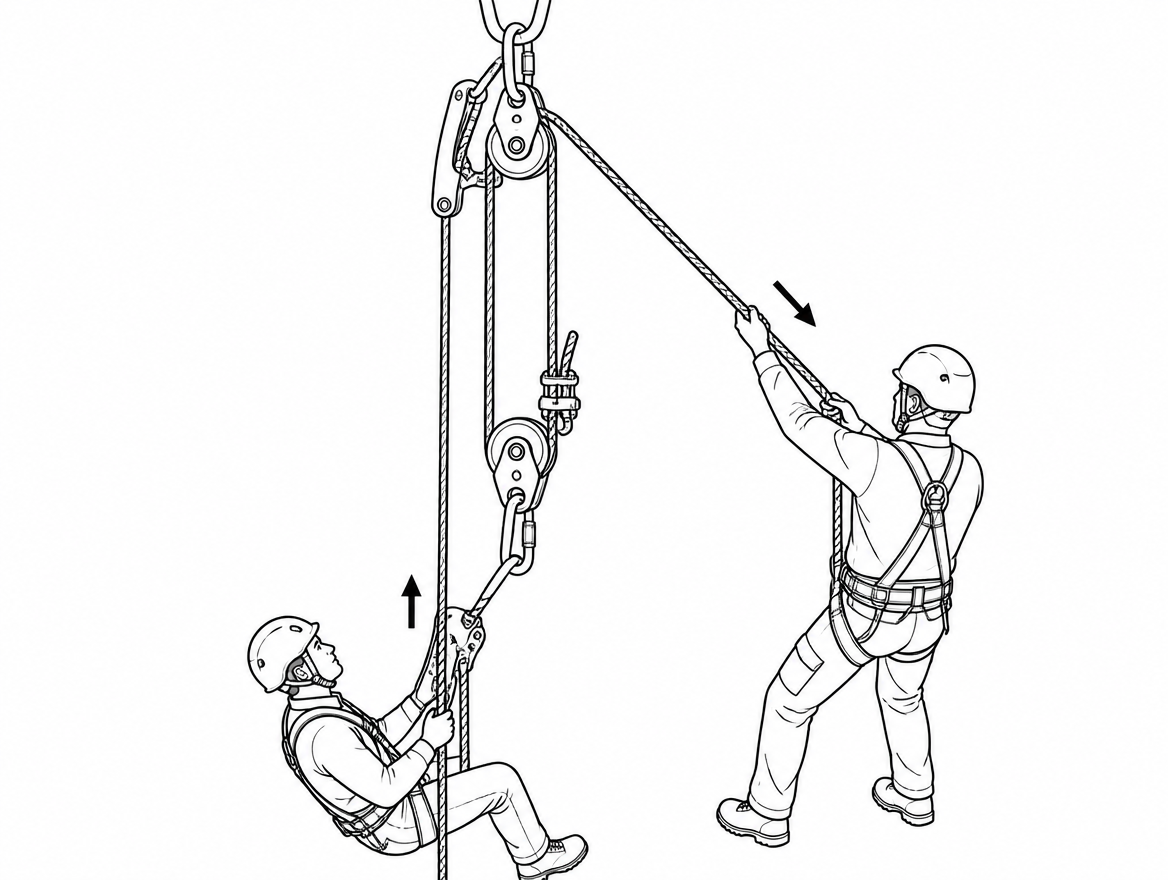
1. Unweight the device with a small hauling system
This is the cleanest method and it is the one most teams under-practise. A 3:1 system built from two EN 12278 pulleys and a rope grab, with a progress-capture device at the anchor or at the rescuer’s harness, lifts the casualty a few centimetres — enough for the jammed cam or locked descender to come free by hand. The lift required is small; the hauling system does not have to be elegant, only sufficient and captured so the lift cannot be lost mid-manoeuvre.
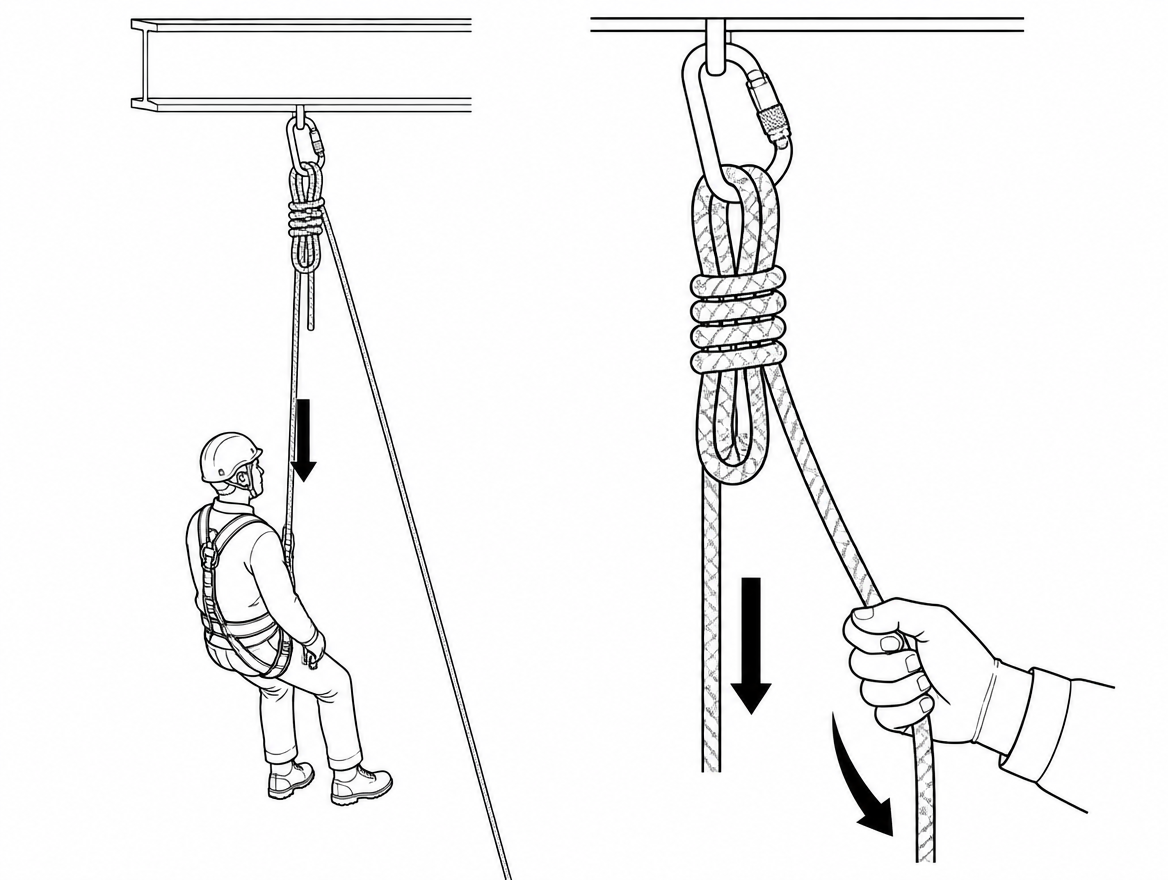
2. Release a pre-rigged releasable tie-off
Where the casualty’s line can be reached at the anchor, a tie-off that was rigged to be released under load — a Munter–mule combination, or a load-release hitch built with a friction hitch and a mechanical advantage loop — allows the load to be lowered progressively onto the rescue system without any lifting at all. The condition is that it was rigged that way in the first place. A rope tied off with a knot that welds under load offers no such option, which is why anchor tie-off method belongs in the pre-work rigging plan rather than in the rescue.
3. Cut the loaded rope — last resort only
Cutting is fast, irreversible and unforgiving of error. It is justified only when the casualty’s full weight is demonstrably on the rescue system, when the rope to be cut is visibly slack, and when the rescuer has positively identified which rope is which. The sequence is: transfer, confirm slack by hand, confirm the correct strand by tracing it from the casualty’s harness to the cut point, then cut with a dedicated shielded-blade rescue knife below the device and clear of every other line. Any doubt about which strand is loaded means the answer is not to cut.
Counterbalance pick-off and controlled lowering
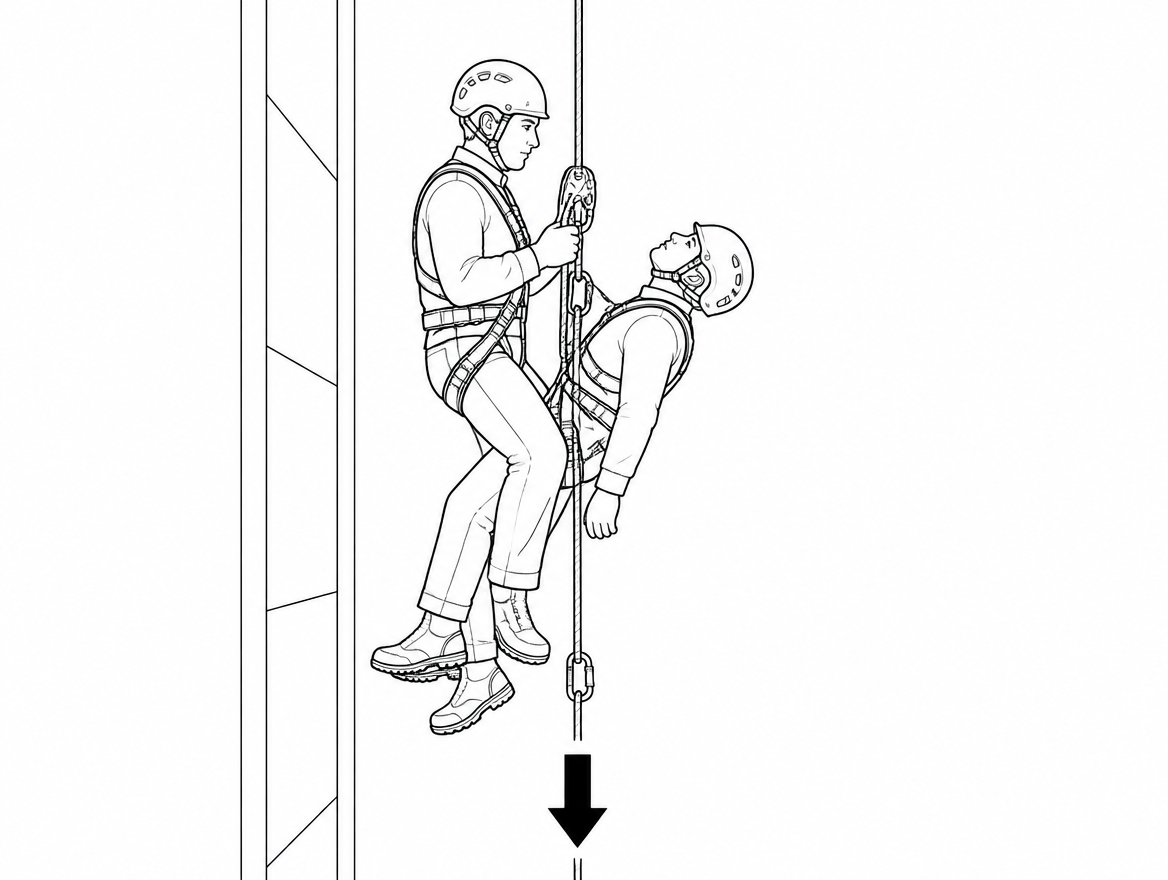
With the casualty’s weight on the rescue system, the descent is a two-person load on one descender. In a counterbalance pick-off the rescuer’s own weight and the casualty’s weight are both carried by the descender, and the friction setting, rope diameter and declared two-person rating all have to match the device in hand. Practical points that decide whether the lower goes well:
- Keep the casualty’s connection short so their head stays above the rescuer’s shoulder line and the airway is accessible throughout.
- Support the casualty’s legs where possible; a horizontal-ish or seated attitude is easier on circulation than a straight vertical hang in leg straps.
- Add friction rather than grip strength — a redirect through a carabiner or the descender’s high-friction position gives controllable speed at double load.
- Assign one person at ground level to watch the rope path and the landing zone, and one to receive the casualty.
- Where the casualty must be raised instead of lowered, a rescue lifting device to EN 1496 combined with a rescue harness to EN 1497 or a rescue loop to EN 1498 is the intended equipment, not an improvised haul on a work line.
Bringing the casualty over an edge
Edges cause more failed extractions than the vertical section does. A rope loaded over a parapet or steel beam produces high local pressure, and a two-person load doubles it. Edge rollers or a rigid edge protector, a directional anchor set back from the edge, and a deliberate change of angle before the transition all reduce the force needed to bring a limp casualty across. Where the ground team can lower to a level below the edge instead of hauling over it, lowering is almost always the lower-risk option.
After the rescue: casualty care and kit quarantine
Casualty care follows normal emergency medical protocols; no harness-specific positioning rule overrides them. On the equipment side, everything that took the fall or the arrest comes out of service immediately and is quarantined for assessment by a competent person. EN 365 sets the framework for instructions for use, marking, and periodic examination, and specifies that periodic examination is carried out by a competent person at intervals of no more than 12 months — but an arrest event triggers an examination regardless of where the annual date falls. For rope, that means the affected length of EN 1891 rope, the arresting device, the connectors and the anchor sling. Sheath damage from a cam and core damage from a shock load are both possible without an obvious external mark.
The rescue debrief should record what actually happened, not what the plan said: how long the casualty was suspended, which device was loaded, how the load was transferred, and what was missing from the kit. That record is the raw material for improving the plan.
Rescue kit that belongs on a static rope worksite
A rescue kit that lives in a van is not a rescue kit. The minimum set for a two-rope worksite, carried to the work position:
- Dedicated rescue line of EN 1891 Type A rope, length exceeding the working height with margin, with a separate safety line.
- A descender rated for two-person load per its manufacturer instructions — EN 341 for rescue lowering, or an EN 12841 Type C device where its declared rescue load permits.
- Back-up device to EN 12841 Type A on the rescuer’s safety line, plus ascending device to EN 12841 Type B.
- Two pulleys to EN 12278, a rope grab and enough cord to build a 3:1 with progress capture.
- Adjustable pick-off strop, plus a rescue harness to EN 1497 or rescue loop to EN 1498 where the casualty may need to be raised or is not wearing a suitable harness.
- Locking connectors to EN 362, anchor slings to EN 795 or EN 566 as appropriate, edge protection, and a shielded rescue knife.
Competence and drills
Load transfer under tension is a motor skill, and it decays. EN ISO 22846-2 treats rescue capability as part of the operational competence of a rope access team rather than an add-on qualification, which means drills belong on the work programme with a documented frequency, recorded attendance and realistic scenarios — an unresponsive weight on a loaded device at a real edge, not a volunteer standing helpfully in a foot loop on the ground. The single most valuable drill to time repeatedly is the one covered above: reaching a suspended person, connecting them, unweighting a jammed device and releasing it.
Takeaway
Every static rope rescue reduces to one question asked in the right order: where is the load now, and where is it going next? Reach the casualty on an independent anchor, connect before releasing anything, unweight the jammed device rather than fighting it, and cut only when the rope is provably slack. Before the next shift on rope, check two things against the plan: whether the anchors are tied off in a way that can be released under load, and whether the full load-transfer kit is on the harness of the person who would have to use it.
Next step: review the site rescue plan against the equipment actually present, and confirm every device’s declared rescue load and rope diameter range in its manufacturer instructions rather than assuming it from the standard number alone.
Frequently asked questions
Why must the load be transferred before a casualty on a static rope can be lowered?
On a low-stretch rope the casualty is usually held by a device that has locked onto the sheath under load — a panic-gripped descender, an ascender jammed against a knot, or a back-up device that has arrested on the safety line. None of those devices will let go while they are loaded, so a loaded rope grab or descender cannot be opened or released until the tension on it is removed. The load has to be moved somewhere else before anyone can be lowered.
What does EN 1891 specify, and why does low stretch matter in a rescue?
EN 1891 covers low-stretch kernmantle ropes in Type A and Type B, with Type A the working standard for rope access and rescue and Type B lighter-duty with lower strength and lower test loads. It limits elongation to 5 % between a 50 kg and a 150 kg load. That makes the rope good for ascending and descending but unforgiving in a fall: there is almost no stretch to absorb energy, so slack converts directly into impact force on the anchor, the device and the person.
Which EN standards frame the equipment used in a static rope rescue?
EN 12841 covers rope adjustment devices, split into Type A back-up devices for the safety line, Type B ascending devices and Type C descending devices, written around use on EN 1891 Type A rope within the manufacturer's declared diameter range. EN 341 covers devices for lowering people in rescue, with classes differing by rated load and total descent energy. Harness attachment points come from EN 361, EN 813, EN 358 and EN 1497; rescue loops are EN 1498, connectors EN 362, pulleys EN 12278 and anchor devices EN 795. EN ISO 22846-1 and -2 set out rope access principles and code of practice.
How urgent is a motionless suspension, and what does current guidance say about post-rescue positioning?
Prolonged motionless suspension can lead to suspension syncope (orthostatic intolerance or suspension trauma), where venous return is impaired by immobility and leg-strap pressure. Specific survival timelines that circulate in toolbox talks are not established; the defensible position is that an unresponsive suspended person is a medical emergency and the plan should reach and lower them in minutes. The HSE-commissioned evidence review RR708 (2009) found the old instruction to keep a casualty semi-recumbent for a fixed period was not supported and could delay normal resuscitation — current practice is standard first-aid and resuscitation protocols.
How should the rescuer approach the casualty without creating a second casualty?
Do not descend on the same rope the casualty is hanging from — that concentrates two people, two devices and any shock loading onto one anchor and one length of sheath that may already be damaged. Rig the rescue line from an EN 795 anchor independent of the casualty's anchors, as close to directly above them as the structure allows, and descend on an EN 12841 Type C descender or an EN 341 device whose declared maximum load covers a two-person descent, taken from the manufacturer's instructions for that specific device. Approaching with slack in your own line risks a short but high-force fall onto a rope that will not stretch to help.
Need this as a document you can issue? The template library gives you the risk assessments, permits and inspection logs in editable form — and employer plans cover a whole team with completion records.