Safety / Tips and Tricks / Rope access and confined space
Activity 01 · Rope access
Greater Efficiency on Rope Ascents: Technique, Geometry and Equipment Set-Up
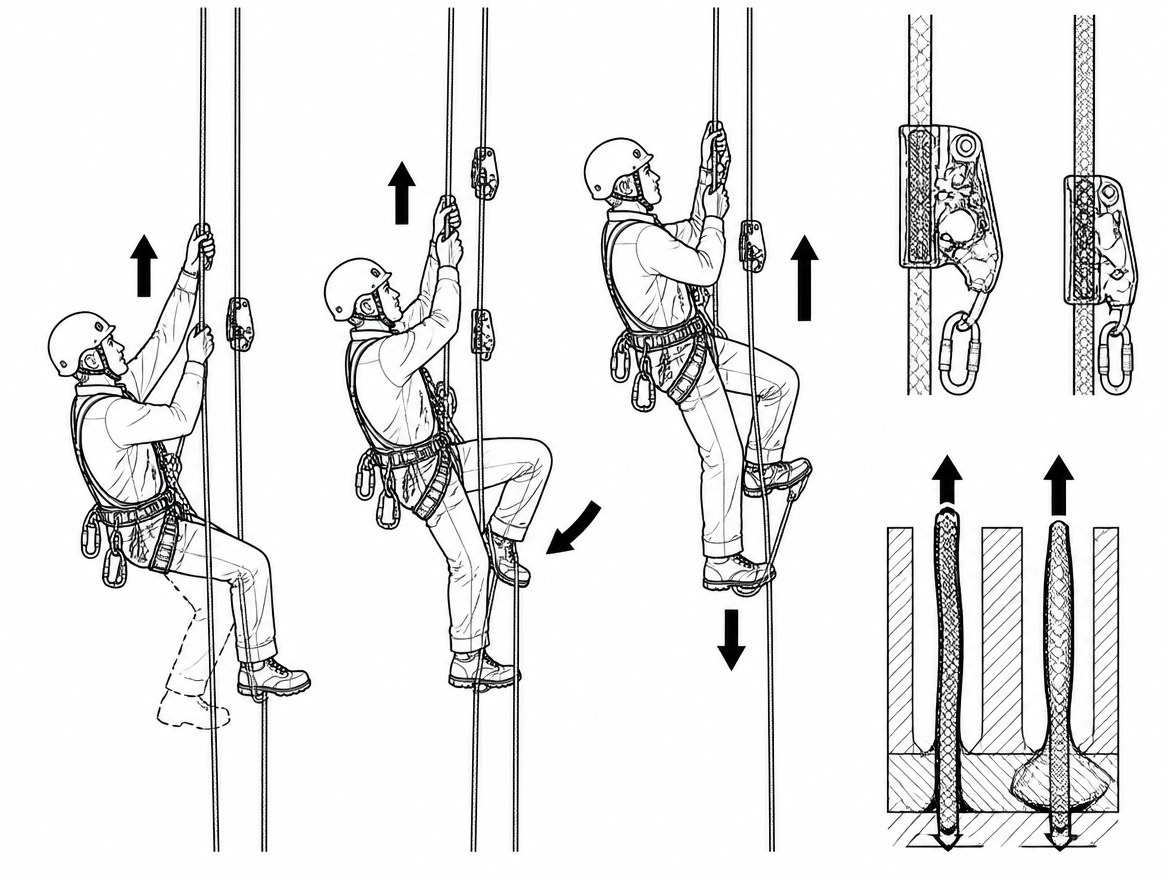
On a long ascent, inefficiency is not just slow — it is a safety problem. Every wasted centimetre of rope stretch and every stroke driven by the arms instead of the legs increases time in suspension, grip fatigue and forearm cramp, and reduces the physical reserve a technician needs to pass a rebelay cleanly, operate a backup device or assist a colleague. Rope ascent efficiency technique is therefore a competence issue as much as a productivity one: a worker who arrives at the top of a 40 m pitch with steady hands and controlled breathing is a worker who can still make good decisions.
The good news is that most of the available gains are mechanical rather than athletic. They come from four things: body position relative to the rope, the geometry of the ascender set-up, the condition and behaviour of the rope, and the sequencing of transitions. Each can be adjusted on site, in minutes, without buying anything new.
Why body position costs more energy than fitness does
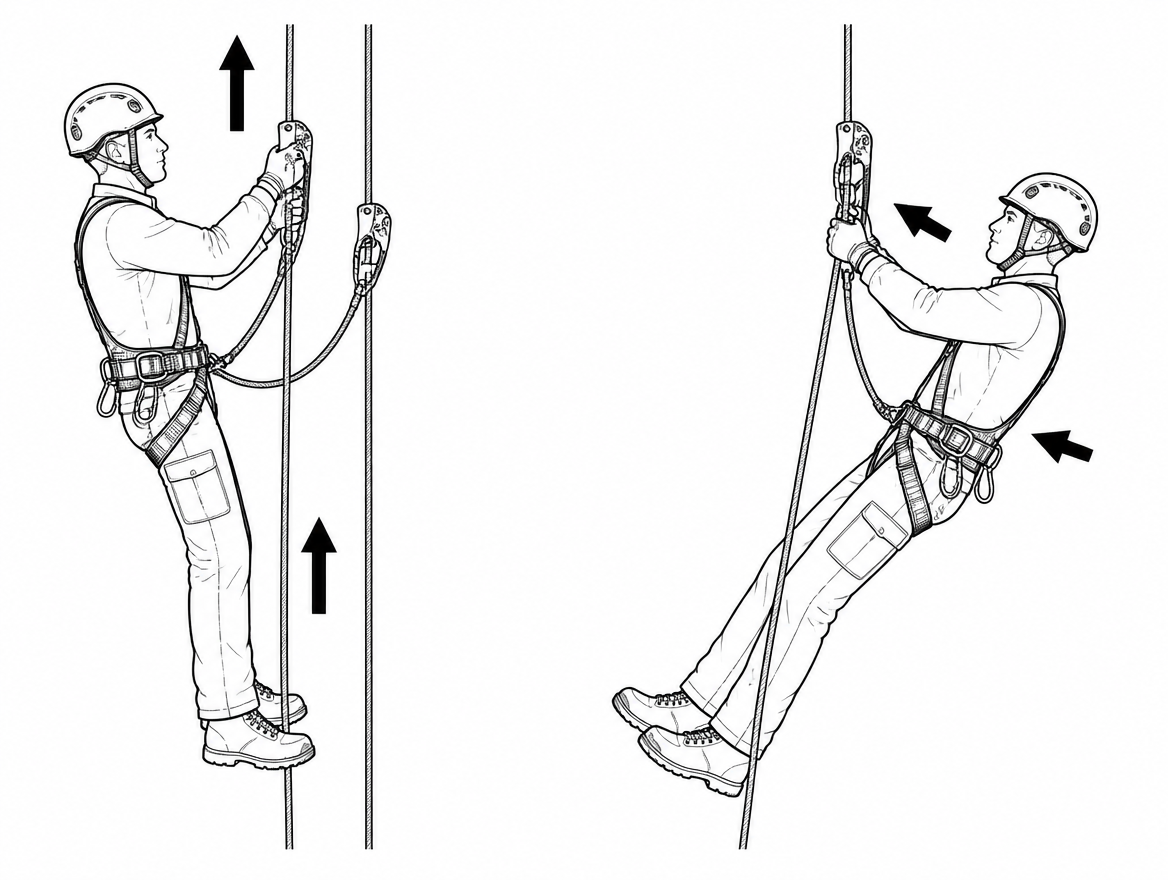
A rope ascender system only converts effort into height when the load path is vertical. If the torso hangs away from the rope and the arms are bent, part of every push is spent pulling the body back toward the line instead of lifting it. That component does no useful work, and it is paid for by the biceps, forearms and grip — the muscle groups that fail first and that are needed for device handling.
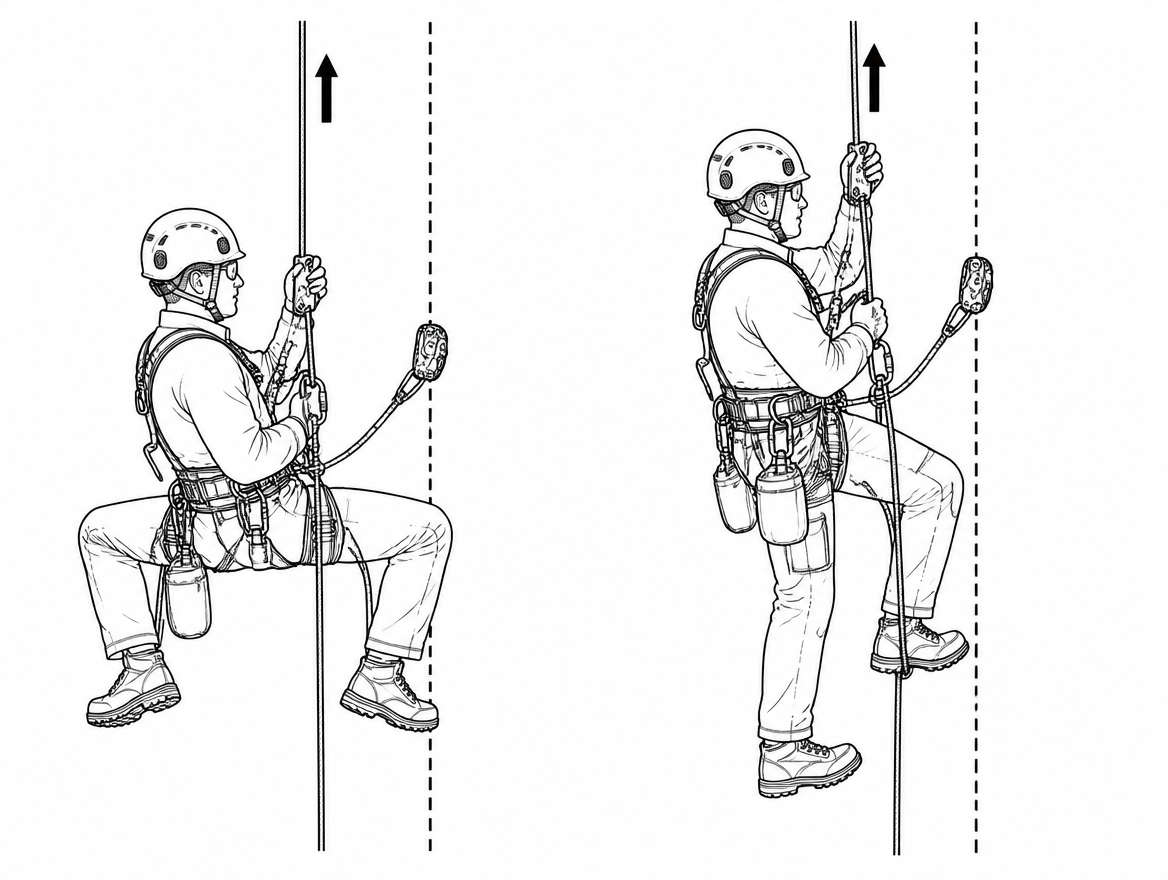
The reference position for a frog-type system is compact and close: the ventral attachment point of the sit harness (EN 813) sits directly under the chest ascender, the chest ascender holds the sternum near the rope, and the arms are used to slide the handled ascender upward, not to haul the body up. At the top of the extension the legs are almost straight and the hips are under the rope, not behind it.
Three checks that restore alignment
- Chest attachment tension. The chest ascender should be held snugly against the rope by the chest harness or torso strap. If it sags, the upper body swings out and the rope runs diagonally through the device.
- Harness fit at the ventral point. A loose waist belt lets the attachment point ride upward, which lengthens the effective distance between hips and rope and shortens each stroke.
- Load line clearance. Tool bags, rescue kit and long cowstails hanging in front of the thighs force the knees outward and the body away from the rope. Rack them to the side or below.
The stroke: legs push, arms guide
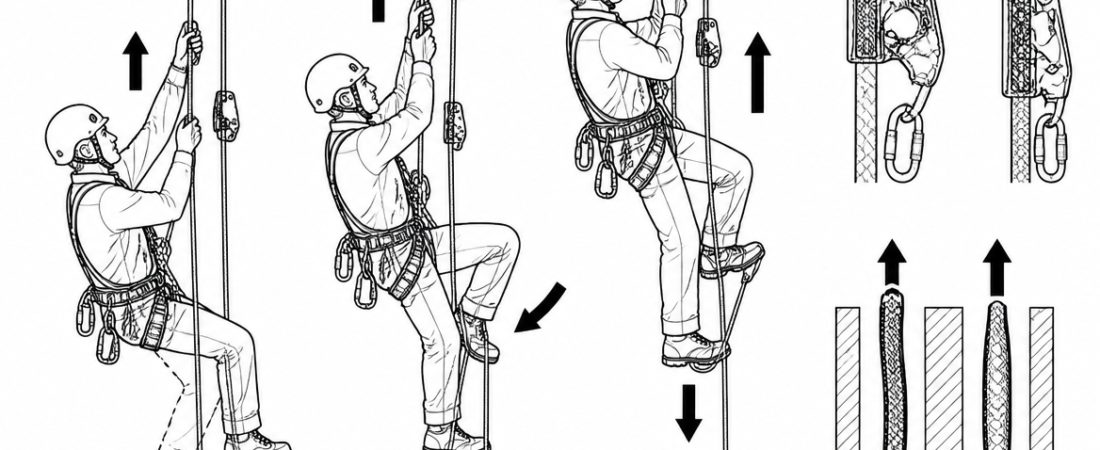
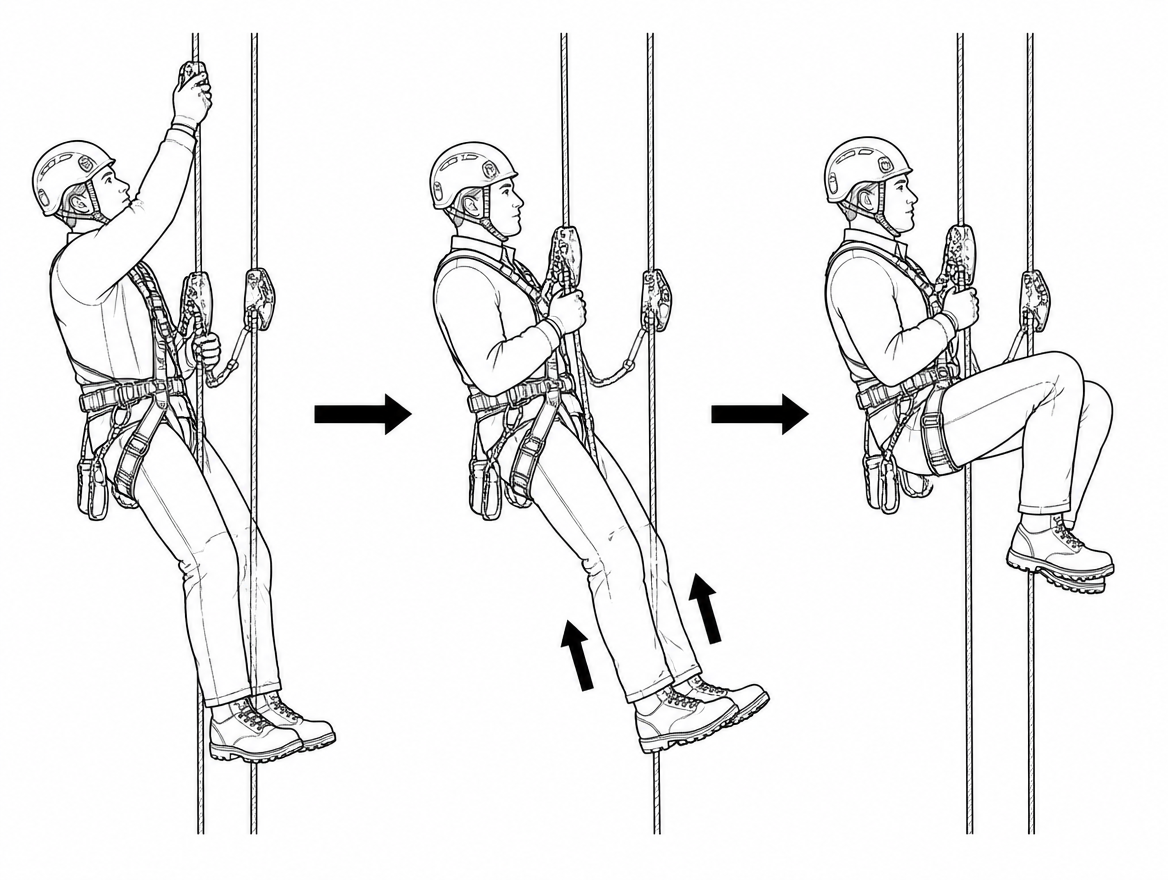
An efficient ascent cycle has a clear division of labour. In the compressed position, the knees are drawn up and the handled ascender is pushed as high as the arms can reach without the shoulders lifting off the rope. The legs then extend against the foot loop while the chest ascender takes up rope automatically. At the top of the extension, the climber sits back onto the chest ascender, unweights the foot loop, and draws the knees up again in one movement.
Two habits waste the most: pulling down on the handled ascender during the extension (arms doing leg work), and pausing at the top of each cycle with the arms still loaded rather than transferring the weight onto the chest device. Both are easy to spot from the ground — the ascent looks jerky and the shoulders stay high.
Setting foot loop and cowstail lengths for full stroke length
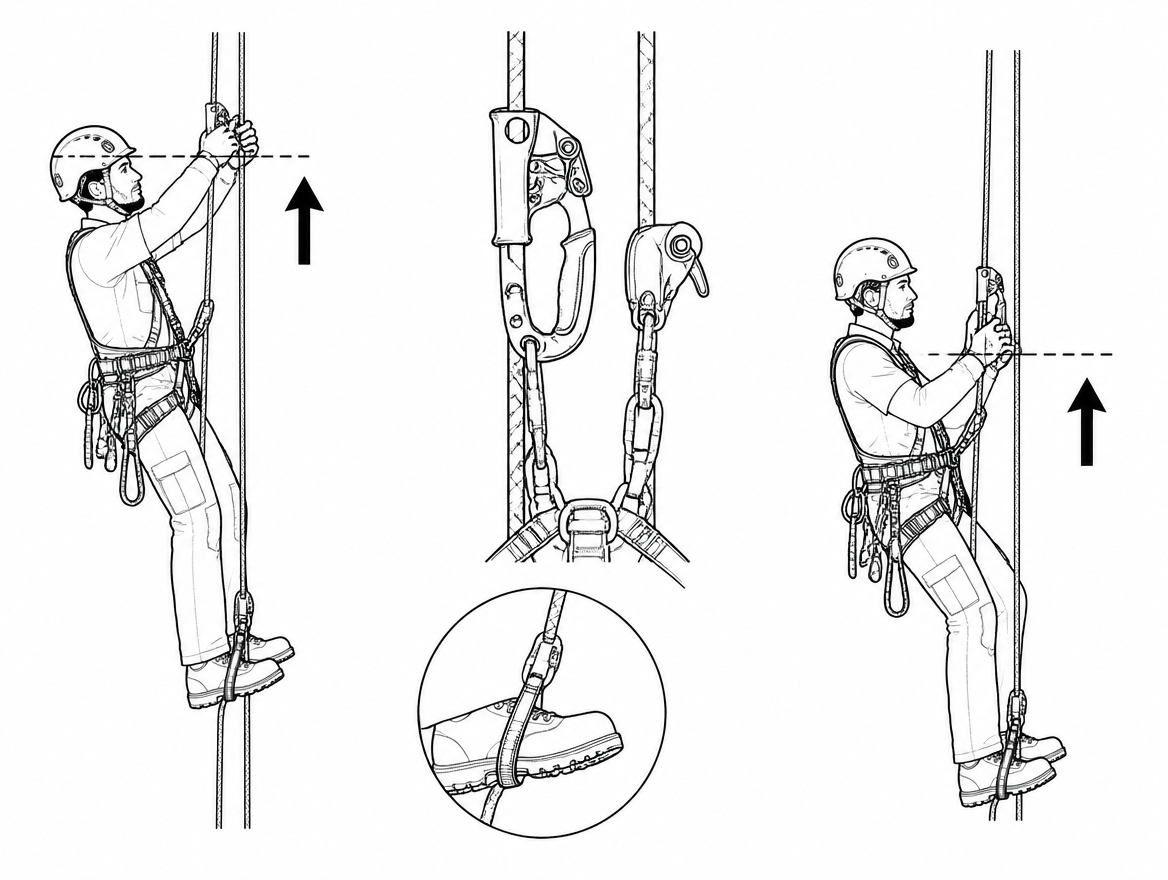
Stroke length is set by the foot loop, and it is the single adjustment most often left wrong. A loop that is too long means the handled ascender cannot be pushed high before the leg runs out of travel: the climber makes many short, high-cadence strokes and burns energy on repetition. A loop that is too short forces excessive knee flexion, which is inefficient at the start of the push and hard on the knees.
A practical calibration: standing fully extended in the foot loop with the body compact against the rope, the handled ascender should sit at roughly forehead height with the arms straight. If it sits at chest height, the loop is too long. Adjust in small increments and re-test on the same pitch — changes of a few centimetres are noticeable.
The same logic applies to the connection between the handled ascender and the harness. If that link is too long, the climber cannot sit back cleanly onto the chest device at the top of the stroke and loses height on every cycle. If it is too short, the ascender cannot be pushed to full reach.
Rope choice, rope tension and where the height disappears
Rope elongation quietly consumes a share of every early stroke. Ropes used for rope access work are low-stretch kernmantle ropes to EN 1891; Type A ropes are the usual choice for working and safety lines in industrial rope access, and the standard limits elongation of the rope under a load increase from 50 kg to 150 kg. “Low stretch” is not “no stretch”, however, and on a long free hang the first metres of ascent are partly spent taking up the stretch in the rope above.
Two measures reduce the loss:
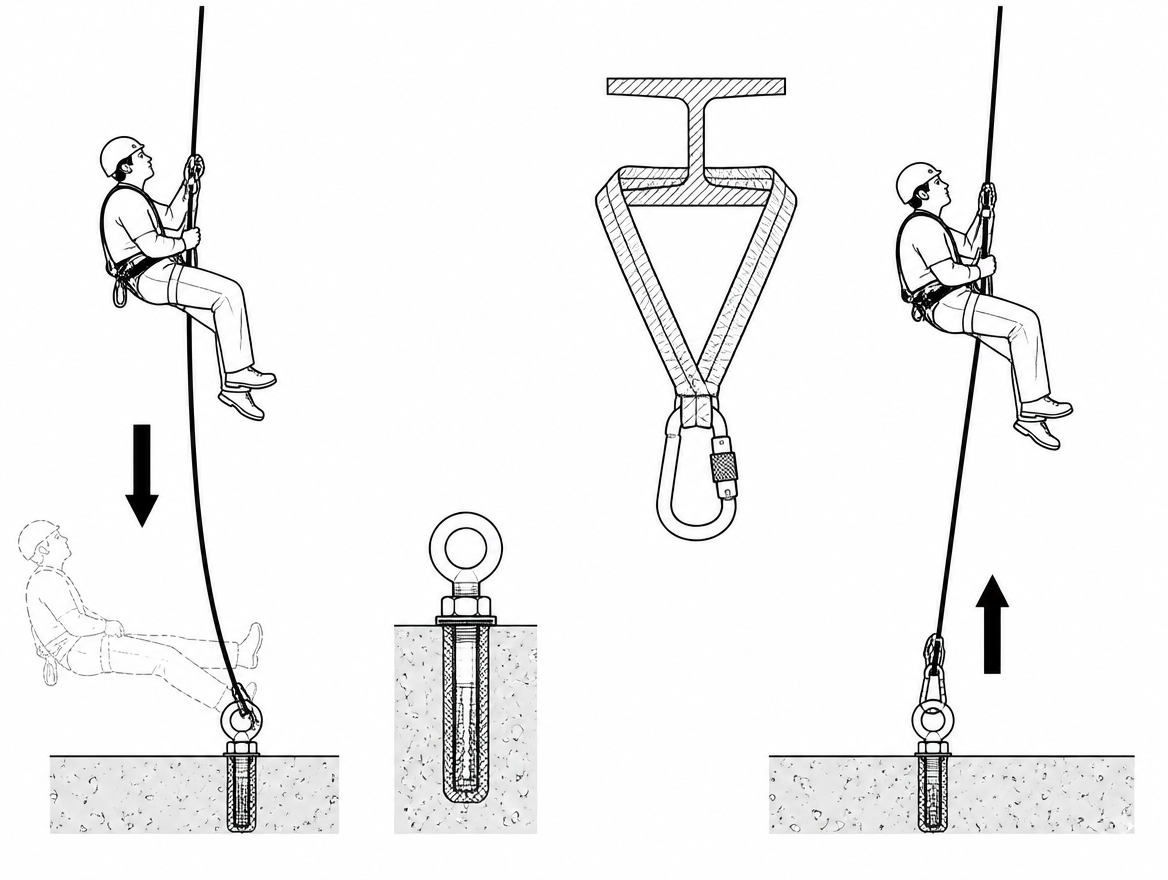
- Tension the lower end where the structure allows it. A rope anchored or weighted at the bottom stops bouncing and stops absorbing stroke length. Where a lower anchor is used, it must be a rated anchor point consistent with EN 795 and the site’s anchor plan — not a convenient handrail.
- Match rope diameter to the devices. Every rope adjustment device to EN 12841 is rated for a specific rope diameter range, and grip and slip behaviour degrade outside it. Read the diameter range marked on the device itself and check it against the rope in use rather than assuming compatibility across a mixed kit.
Rope condition matters as much as rope specification. Cam teeth clogged with mud, cement dust or ice slip under load, and each micro-slip is lost height plus a jolt through the shoulders. Clean and dry ropes, clear the cam and spring on ascenders during pre-use checks, and take dirty or glazed ropes out of service for inspection rather than fighting them.
Frog systems and rope-walking systems: choosing for the pitch
The frog system — chest ascender plus handled ascender with a single or double foot loop — is the default for industrial rope access because it handles rebelays, deviations and knot passes with the fewest device changes, and because it leaves the climber upright and able to work at any point on the rope.
Rope-walking configurations, which add a knee ascender or foot ascenders so that the climber alternates legs in a walking motion, are markedly faster on long, clean free hangs. They are also slower and more awkward at every transition, because more devices must be removed and replaced. The decision is therefore driven by the rope, not by preference:
- Long uninterrupted pitch, minimal rigging: a rope-walking or knee-ascender-assisted set-up repays its complexity.
- Multiple rebelays, deviations or edge transitions: a clean frog set-up wins, because the time is spent at the transitions, not in the vertical.
- Confined or cluttered structures: fewer devices on the rope means fewer snag points.
Whichever system is used, the backup arrangement does not change. Rope access work is carried out on two independently anchored ropes — a working line and a safety line — as set out in the code of practice for personal rope access systems, EN ISO 22846-2, with a fall arrest or rope adjustment device of EN 12841 Type A on the safety line and a full body harness to EN 361 where fall arrest attachment is required. An efficient ascent is one where the backup device is advanced continuously with the ascent and never left to trail slack; slack on the safety line is both a fall-distance problem and a source of drag that has to be dragged upward later.
Transitions: where minutes are actually lost
On most industrial ropes, the vertical metres are not the bottleneck. Rebelays, knot passes and edge transitions are, because each one involves changing the load between devices while managing a backup. Efficiency here is entirely about sequence and rehearsal, not speed:
- Stop with the device to be moved within comfortable reach — not above the head, not at the waist.
- Establish the new connection before releasing the old one, so the climber is never briefly unattached.
- Move the backup device onto the new section of safety line in a defined, always-identical order.
- Take up slack, check gates are closed and loaded correctly, then resume.
The gains come from doing the same sequence the same way every time. That is a training outcome: transitions should be practised at ground level or on a short rehearsal rope until the order is automatic, which is also how a competent organisation demonstrates that its rope access competence requirements are being managed rather than assumed under an ISO 45001 occupational health and safety management system.
Pacing, heat and suspension time
A steady cadence that can be sustained for the whole pitch produces a faster overall ascent than bursts followed by recovery hangs, and it keeps grip strength in reserve. Two practical points:
- Dress for the ascent, not the wait. Overheating during the climb costs more performance than the cold felt while rigging. Layers that can be shed before the ascent are preferable to a single heavy layer.
- Limit unnecessary time in suspension. A sit harness loaded for long static periods restricts circulation in the thighs. Where a rest is needed, stand up in the foot loop periodically to unweight the leg loops, and keep planned rest stops short and deliberate.
Rescue capability is part of the same calculation. The rescue plan required for rope access work assumes the rescuer arrives with usable strength; an ascent technique that leaves the whole team at its physical limit is not a compliant plan, it is a hope.
Testing changes one at a time
Improvements are easy to verify if they are isolated. Use the same pitch, note the time and the perceived effort, and change one variable per ascent: foot loop length, chest strap tension, cowstail length, lower-end tension. Changing three things at once produces an opinion; changing one produces information.
Before the next ascent, run the pre-use check with efficiency in mind as well as integrity: cam teeth clean and free, springs returning fully, rope diameter within the device’s marked range, harness attachment points tight and correctly positioned, and connectors closing and locking freely. A device inspected to the manufacturer’s instructions and to the periodic examination regime required for personal fall protection equipment is also a device that grips the rope without slipping — which is the cheapest efficiency gain available.
Next step: review your team’s rope access equipment inspection records against the manufacturers’ stated inspection intervals, and check that the ascenders and backup devices in each kit share a compatible rope diameter range with the ropes actually rigged on site.
Frequently asked questions
Why is an inefficient rope ascent a safety problem and not just a slow one?
Wasted rope stretch and strokes driven by the arms instead of the legs increase time in suspension, grip fatigue and forearm cramp. That reduces the physical reserve a technician needs to pass a rebelay cleanly, operate a backup device or assist a colleague. A worker who reaches the top of a 40 m pitch with steady hands and controlled breathing is still able to make good decisions.
What is the correct body position for a frog-type ascender system?
The position should be compact and close to the rope: the ventral attachment point of the sit harness (EN 813) sits directly under the chest ascender, the chest ascender holds the sternum near the rope, and the arms only slide the handled ascender upward rather than hauling the body up. At the top of the extension the legs are almost straight and the hips are under the rope, not behind it. Leaning the torso back forces the arms to pull the body toward the rope, which does no useful work and is paid for by the biceps, forearms and grip.
Which three checks restore alignment on the rope?
First, chest attachment tension — the chest ascender should be held snugly against the rope by the chest harness or torso strap, because if it sags the upper body swings out and the rope runs diagonally through the device. Second, harness fit at the ventral point — a loose waist belt lets the attachment point ride upward, lengthening the effective distance between hips and rope and shortening each stroke. Third, load line clearance — tool bags, rescue kit and long cowstails hanging in front of the thighs push the knees outward and the body away from the rope, so they should be racked to the side or below.
How do I know whether my foot loop length is correct?
Stand fully extended in the foot loop with the body compact against the rope: the handled ascender should sit at roughly forehead height with the arms straight. If it sits at chest height, the loop is too long. A loop that is too long means many short, high-cadence strokes; one that is too short forces excessive knee flexion, which is inefficient at the start of the push and hard on the knees. Adjust in small increments and re-test on the same pitch, since changes of a few centimetres are noticeable.
How much does rope stretch affect an ascent, and what reduces the loss?
Ropes for rope access work are low-stretch kernmantle ropes to EN 1891, with Type A the usual choice for working and safety lines in industrial rope access, and the standard limits elongation under a load increase from 50 kg to 150 kg. But "low stretch" is not "no stretch": on a long free hang the first metres of ascent are partly spent taking up stretch in the rope above. Tensioning the lower end where the structure allows — using a rated anchor point consistent with EN 795 and the site's anchor plan, not a convenient handrail — stops the rope bouncing and absorbing stroke length, and rope diameter should be matched to the marked range on each device.
Need this as a document you can issue? The template library gives you the risk assessments, permits and inspection logs in editable form — and employer plans cover a whole team with completion records.