Safety / Tips and Tricks / Rope access and confined space
Activity 01 · Rope access
Ascender Down-Climb: Losing a Short Distance Safely Without a Changeover
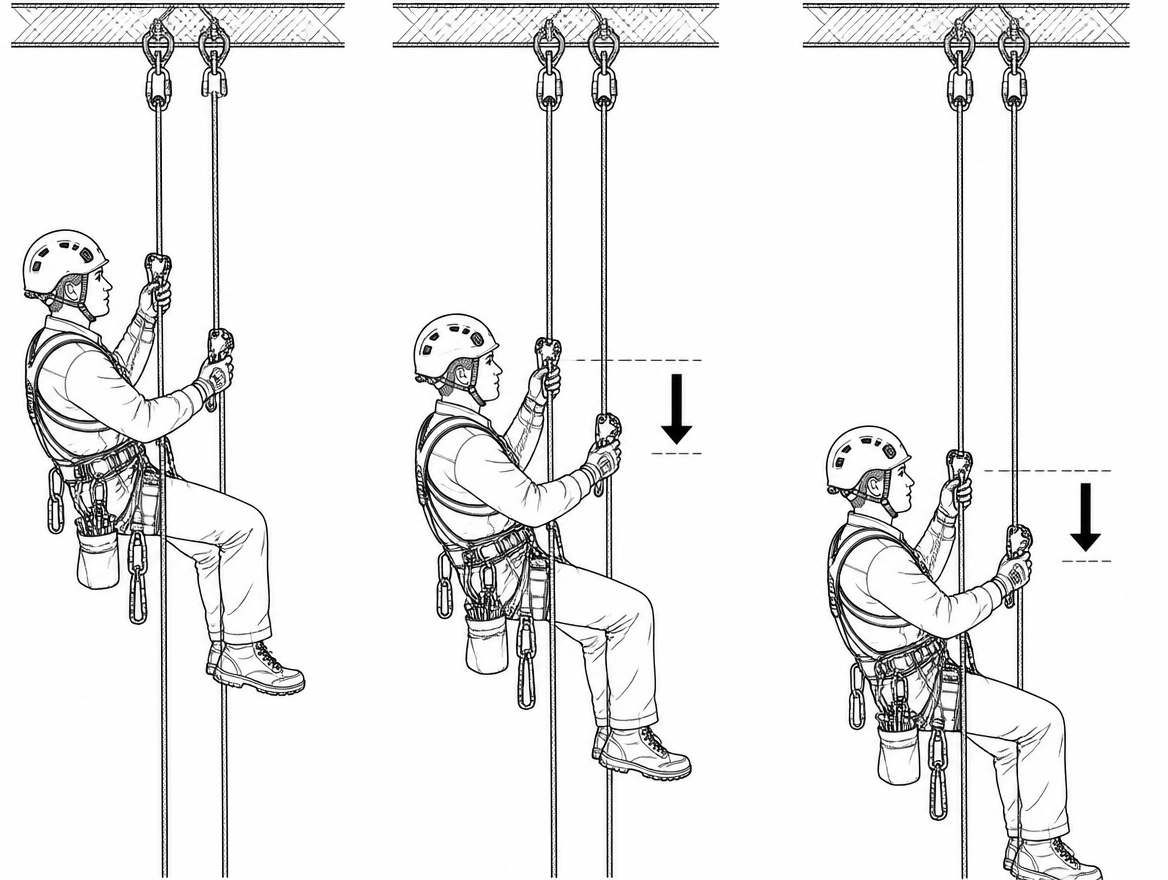
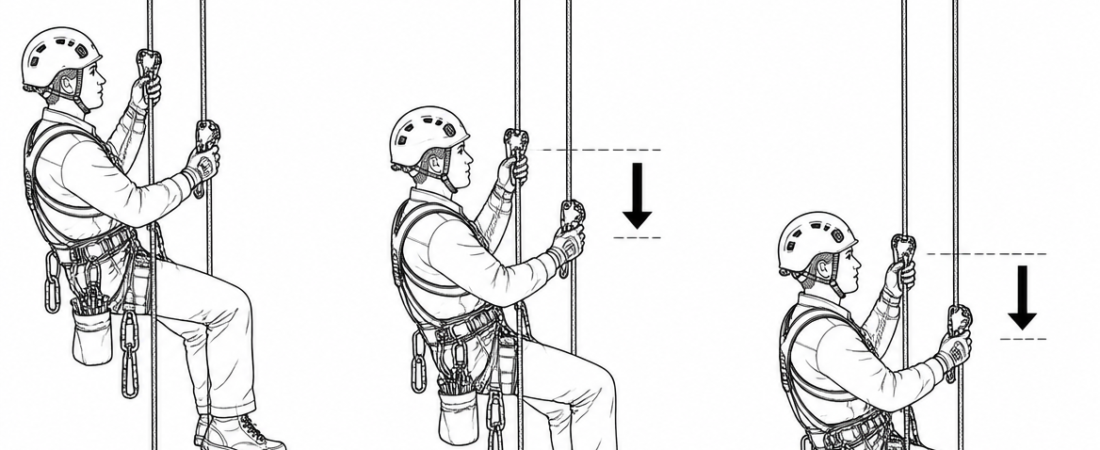
An ascender down-climb is the controlled loss of a short vertical distance — typically anything from 20 cm to about two metres — while remaining on rope clamps rather than switching to a descender. It comes up constantly on real jobs: a technician climbs 40 cm past a deviation and needs to drop back to reach the karabiner, a weld inspection point turns out to be lower than the survey drawing suggested, or an obstruction forces a short reposition before the next re-anchor. The manoeuvre is routine, but it is also the point at which two of the most common rope-access failures appear: both cams open at the same time, and a toothed cam driven downwards under load across the rope sheath.
The technique below assumes a two-rope system in line with EN 12841 and the rope access code of practice in ISO 22846-2: a working line with a Type B ascending device and a handled ascender, and a separate safety line with a Type A backup device.
Ascenders are one-way devices, and the standards treat them that way
EN 12841 classifies rope adjustment devices for rope access into three types: Type A for the safety line (backup), Type B for ascent on the working line, and Type C for descent on the working line. A Type B device is an ascending device. It is not a descender, and it is not a fall arrest device — EN 12841 treats the working-line device and the safety-line backup as parts of a single system, not as alternatives. Handled ascenders used in mountaineering and rescue are commonly certified to EN 567 as rope clamps, again for progression upwards.
Mechanically, the grip comes from an eccentric cam, usually toothed, that rotates into the rope when the device is loaded downwards. Load increases the bite; unloading releases it. That geometry is what makes an ascender safe going up and awkward going down: the device cannot travel downwards while it carries body weight, and forcing it to do so drags steel teeth along the sheath of the rope.
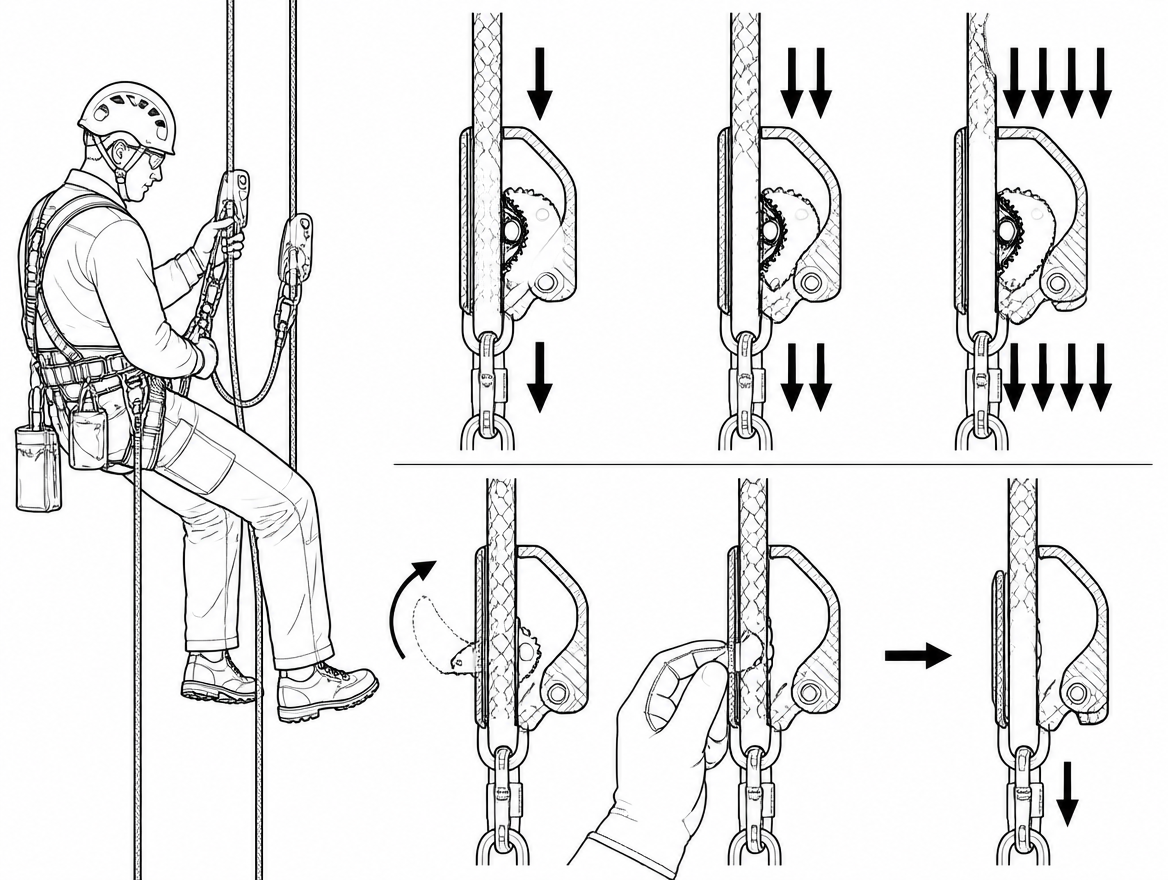
Two consequences follow directly, and they define the whole manoeuvre:
- Every downward movement of an ascender must happen while that device carries no load at all.
- Because one device must therefore be unloaded, the other must be loaded and engaged. Never both open, never both unloaded.
Decide first: increment down-climb or full changeover to descent
The increment method is efficient over short distances and slow, tiring and error-prone over long ones. A practical decision rule:
- Up to roughly one to two metres, on clean rope with nothing in the way: increment down-climb on the ascenders.
- More than that, or more than a handful of increments: change over to a descender certified to EN 12841 Type C (or EN 341 for the relevant lowering applications) and descend properly.
- Any knot, join, deviation reset, edge, rope protector or obstruction in the path: changeover, not a down-climb. Passing an obstruction demands a device that can be controlled continuously, and the increment method offers no control if the rope pinches or the device jams.
Fatigue matters in this decision. Each increment requires a full stand-up in the footloop, and a technician who is already tired at the end of a shift will make the mistakes described further down this article rather than the movements.
Checks before the first increment
Before releasing anything, confirm:
- The rope below is free and tensioned. A working line held taut by a rope bag, weighted end or bottom anchor lets an unloaded device slide cleanly. A slack, tangled or snagged line below makes cam release harder and unpredictable.
- Both devices are on rope of the diameter stated in the manufacturer’s instructions. Instructions supplied under EN 365 give the compatible diameter range; semi-static kernmantle rope to EN 1891 Type A is the usual working line for rope access. Undersized or glazed rope reduces cam bite.
- Attachment points are correct. The chest ascender links to the sit harness attachment point (EN 813) and is held upright by a chest strap; the handled ascender is connected to the harness by a connector to EN 362 through the device’s designated attachment hole, with the footloop as a foot support only, never a load-bearing attachment.
- The backup device on the safety line is high and slack-free, and the safety line runs to an anchor that meets EN 795 for the intended use.
- Both cams and safety catches are intact and clean. Any device with worn or clogged teeth, a sticky cam or a damaged safety catch is withdrawn from service, not nursed through the manoeuvre.
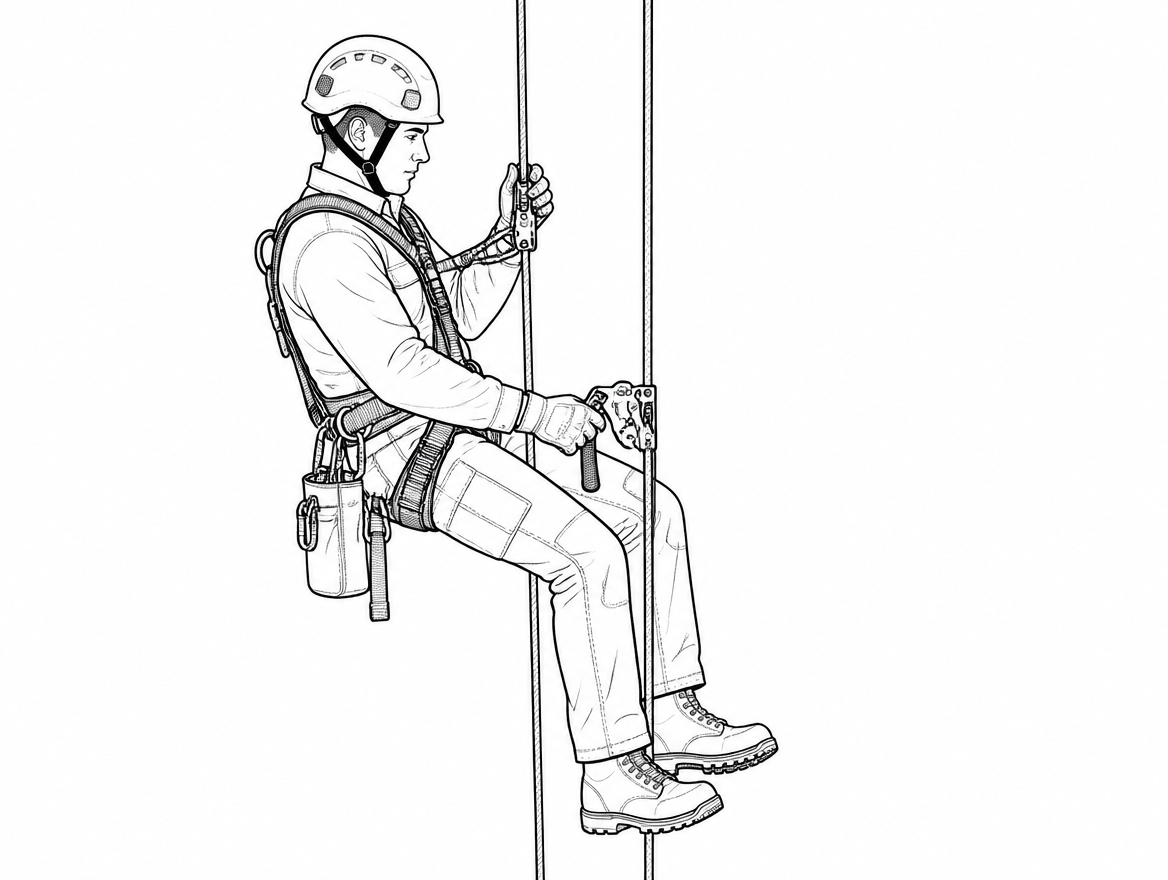
The increment method, step by step
Each cycle moves the system down by roughly 20–30 cm. Longer increments feel faster and are exactly where control is lost.
- Reset the backup. Slide the Type A device on the safety line down so it sits at or above chest height with no slack between the device and the anchor.
- Stand up in the footloop until the chest ascender is completely unweighted. Partial unweighting is not enough — a cam under residual load will not release cleanly and will scuff the sheath when it does.
- Hold the working line below the chest device taut with one hand. This keeps the rope aligned in the device and stops it kinking as the cam opens.
- Release the cam with the thumb catch and slide the chest device down 20–30 cm. Move the device along the rope; do not drag the rope through a partly engaged cam.
- Re-seat the cam and confirm engagement — teeth on the rope, safety catch closed, no twist in the rope.
- Sit down slowly onto the chest device and confirm it holds body weight before taking weight off the feet entirely.
- Unload the handled ascender, release its cam and slide it down until it sits a fist’s width above the chest device, then re-engage and confirm.
- Repeat until the target position is reached, resetting the backup each cycle.
- Finish deliberately. Both cams engaged, backup high and slack-free, footloop clear of the feet, then resume work positioning.
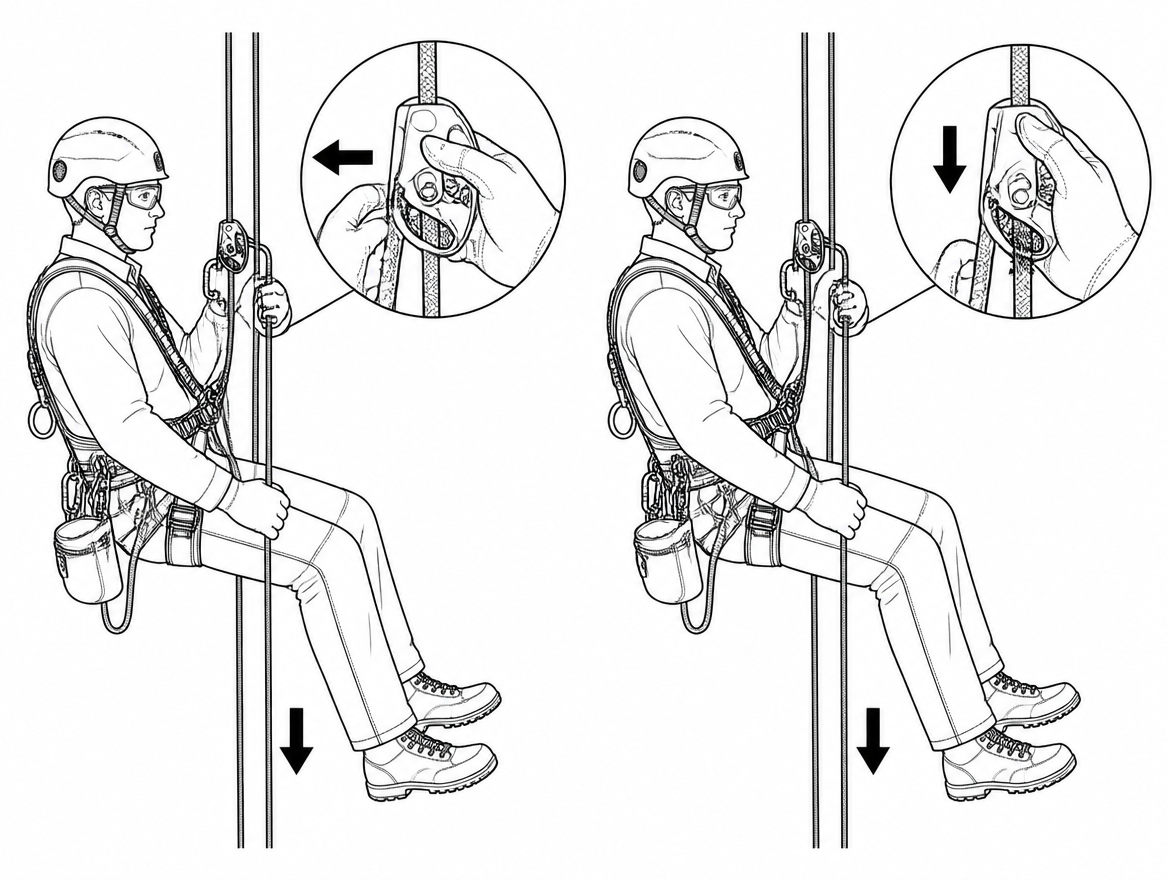
Managing the Type A backup while going down
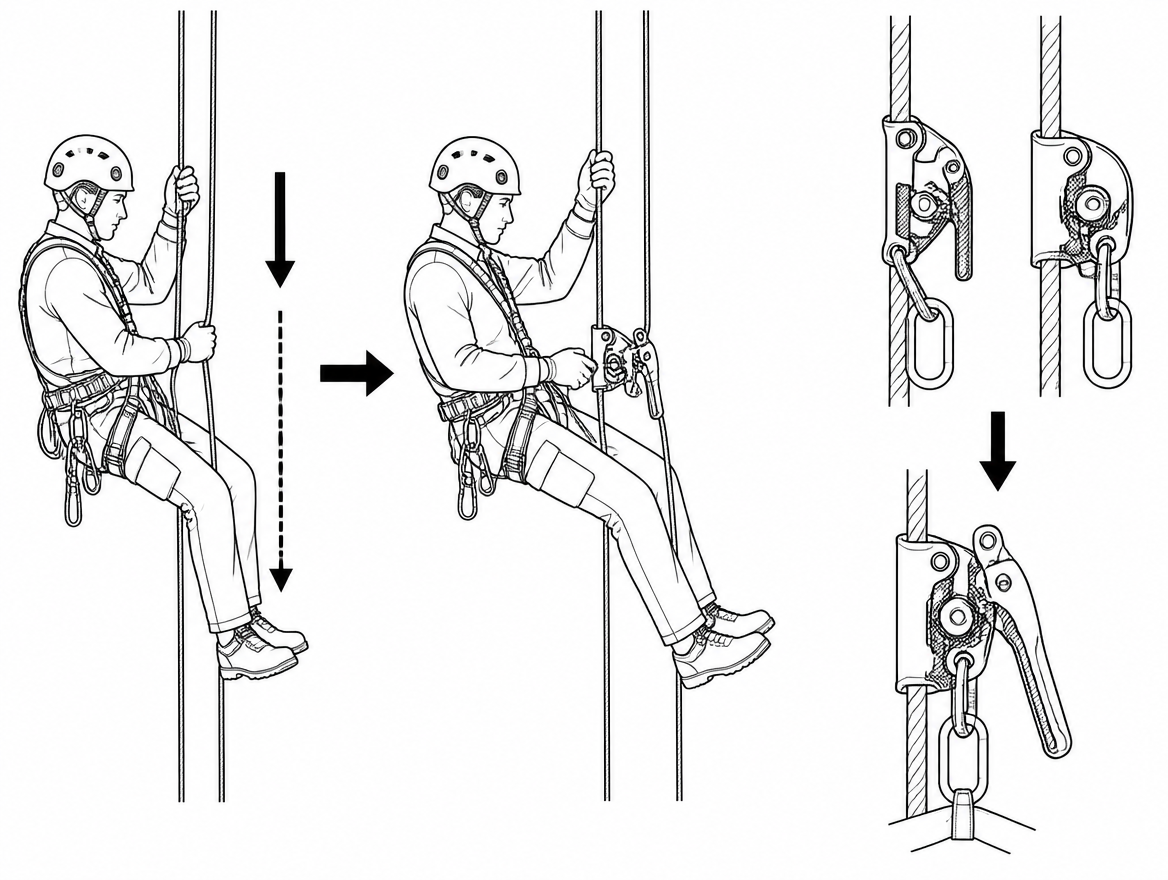
Ascending naturally keeps the backup device travelling upwards with the technician. Down-climbing does not: the safety line goes slack unless the device is actively repositioned every cycle. That slack is the real hazard in this manoeuvre, because it converts a short slip into a fall with measurable free distance and a hard arrest onto the safety line.
Type A devices differ in how they travel. Some slide down under light hand pressure, some must be released and repositioned like an ascender, and manufacturer instructions specify which. Whichever behaviour applies, the discipline is the same: reset the backup at the start of every increment, keep the loop of safety line above the device short, and never allow a belly of slack rope to hang below the device.
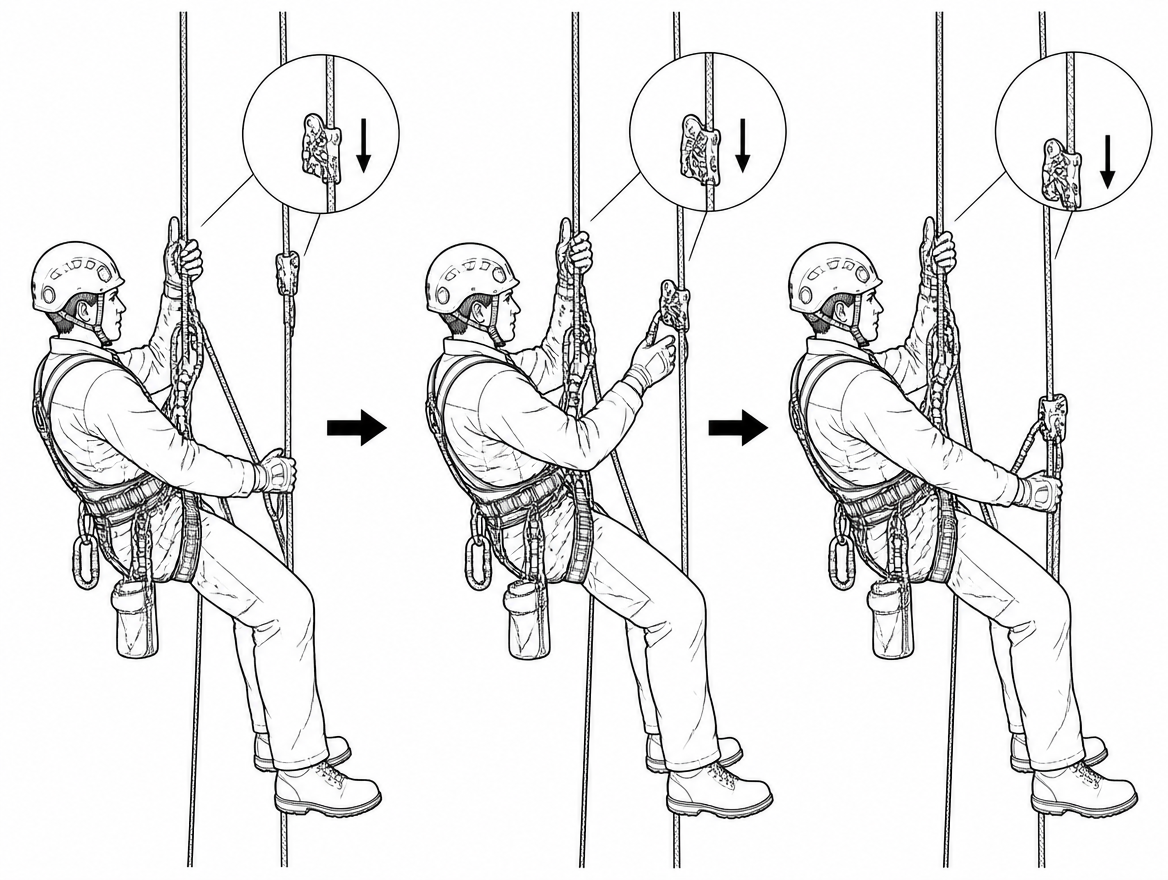
Errors that damage the rope or the technician
- Both cams open at once. The single most serious error. There is no engaged device holding the technician on the working line, and the outcome depends entirely on the backup and how much slack is in it.
- Forcing a loaded device downwards. Toothed cams under load abrade and can cut sheath fibres. Sheath damage found after this kind of handling means the rope is withdrawn from service.
- Letting go of the rope with a cam held open. The device can slide, the rope can flick out of the frame, and the safety catch may not capture it on re-engagement.
- Long increments. Half-metre steps require deep unweighting, long reach and an unstable body position on the footloop.
- Down-climbing towards an edge or obstruction that pinches the rope beneath the device, so the cam cannot be re-engaged in a controlled position.
- Treating the footloop as an attachment. It supports a foot; it is not part of the life-support chain.
- Down-climbing on a rope loaded by someone else, or on a line that also forms part of a hauling or rescue system.
Conditions that rule out an ascender down-climb entirely
Cam grip depends on friction and on teeth reaching the sheath. Wet, muddy, iced or heavily glazed rope reduces both, and manufacturer instructions for most rope clamps warn about performance on contaminated or frozen rope. Add to that:
- Rope diameters outside the device’s stated compatible range.
- Devices with worn, packed or damaged teeth, or a cam that does not spring back positively.
- A knot, splice or rope join anywhere in the intended path of travel.
- Any doubt about whether the required distance is short enough to complete before fatigue sets in.
In each of those cases the correct action is a changeover to a Type C descender, or coming off the rope and re-rigging.
Competence, procedure and equipment records
The down-climb is a trained manoeuvre, not something to improvise mid-shift. ISO 22846-1 and ISO 22846-2 set out the principles and the code of practice for rope access work, including the requirement for a rescue capability appropriate to the work being done — a technician stuck mid-down-climb with a jammed cam is a foreseeable scenario that a rope access plan should already cover. Organisations running a management system to ISO 45001 can carry the technique and its limits directly into the written safe work procedure and the associated competence records, so that permitted and prohibited applications are documented rather than left to individual judgement.
On the equipment side, EN 365 requires periodic examination by a competent person at intervals of no more than 12 months, alongside pre-use checks by the user. Because down-climbing places abrasive contact between cam teeth and sheath at the top of the risk list, both the rope and the ascenders deserve a deliberate look after any manoeuvre where a cam was moved under residual load.
Takeaway
An ascender down-climb is a short-distance tool: unload one device completely, move it 20–30 cm, re-engage and verify, reset the backup, repeat — with one device always loaded and engaged. As soon as the distance exceeds a metre or two, or an obstruction, knot or contaminated rope enters the picture, the manoeuvre stops being efficient and becomes a changeover to an EN 12841 Type C descender. Before adopting it as standard practice on a site, check the specific instructions supplied with each ascender and backup device in use: the permitted directions of travel, compatible rope diameters and cam-release handling vary between models, and those instructions — not habit — define what the device is allowed to do.
Frequently asked questions
What is an ascender down-climb?
It is the controlled loss of a short vertical distance — typically anything from about 20 cm to two metres — while remaining on rope clamps instead of switching to a descender. It comes up when a technician climbs past a deviation, finds an inspection point lower than the drawing suggested, or must reposition around an obstruction.
How far can you down-climb on ascenders before changing over to a descender?
Up to roughly one to two metres on clean rope with nothing in the way, the increment down-climb on ascenders is appropriate. For more than that, more than a handful of increments, or where there is any knot, join, deviation reset, edge, rope protector or obstruction in the path, change over to a descender certified to EN 12841 Type C (or EN 341 for the relevant lowering applications).
Why can an ascender not simply be slid down under load?
The grip comes from an eccentric, usually toothed cam that rotates into the rope when the device is loaded downwards: load increases the bite and unloading releases it. So the device cannot travel downwards while it carries body weight, and forcing it drags steel teeth along the rope sheath. Every downward movement of an ascender must happen while that device carries no load at all — and because one device is unloaded, the other must be loaded and engaged. Never both open, never both unloaded.
What should be checked before the first increment?
Confirm the rope below is free and tensioned (a taut line lets an unloaded device slide cleanly, while a slack, tangled or snagged line makes cam release harder and unpredictable); that both devices are on rope of the diameter stated in the manufacturer's instructions, with semi-static kernmantle rope to EN 1891 Type A the usual working line; that attachment points are correct, with the chest ascender on the sit harness attachment point (EN 813) held upright by a chest strap and the handled ascender connected through its designated attachment hole; that the backup device on the safety line is high and slack-free on a line running to a suitable anchor; and that both cams and safety catches are intact and clean.
How long should each down-climb increment be, and what is the sequence?
Each cycle moves the system down by roughly 20–30 cm; longer increments feel faster and are exactly where control is lost. Reset the Type A backup on the safety line so it sits at or above chest height with no slack, stand up in the footloop until the chest ascender is completely unweighted, hold the working line below the chest device taut with one hand, release the cam with the thumb catch and slide the device down 20–30 cm, re-seat the cam and confirm engagement (teeth on the rope, safety catch closed, no twist), then sit down slowly onto the chest device.
Need this as a document you can issue? The template library gives you the risk assessments, permits and inspection logs in editable form — and employer plans cover a whole team with completion records.